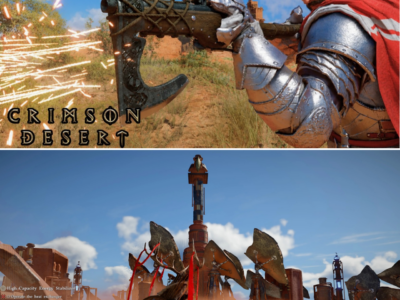
THE PYWEL HOARD: HOW CRIMSON DESERT EXPLORERS ARE BROKENLY EXPLOITING SHADOW DUNGEONS AND GOLDEN HEDGEHOGS TO OVERRIDE THE ENDGAME MATRIX
PEARL ABYSS CONCEALED A ILLEGAL CACHE OF REFINEMENT-LEVEL 10 ARMAMENTS IN PLAIN SIGHT—AND MERCENARIES ARE ABUSED GOLDEN APPLES TO PRINT WEALTH! 🚨🏴☠️
The global Crimson Desert enthusiast network on Reddit and X is imploding into total chaos after advanced scouts mapped out an un-nerfed trajectory to secure hidden items that completely subvert the action meta!
What broken statistical anomaly buried inside a washed-up whale carcass unloads the Alabaster Dagger, and why are hardcore operations masters frantic to hunt down golden-apple-carrying hedgehogs near Dlesia to print infinite Gold Bars at the Witch cauldrons? Stop winging your character attributes like a blind frontline amateur! Click the link below to discover the exact factory coordinates for the 30-chest chapter 8 route, Damiane’s locked Parval Greatsword, and the secret lantern switches that slide open the iron grids before developers hotfix the loot pools! 🔥👇

The dense tactical framework dictating the endgame progression of South Korean developer Pearl Abyss’s Crimson Desert has just experienced its most severe mechanical subversion yet. Boasting an expanding global circulation of over 6 million active mercenaries roaming the hyper-punishing continent of Pywel, the sandbox action-RPG has earned an intense institutional reputation for freezing character damage parameters behind exhausting smithy grinding checks. Yet, following a profound wave of environment mapping sweeps, an underground cartography movement has exposed an immense layer of hidden, rule-breaking armaments and infinite gold-minting loops.
In an extensive coordinate drop and itemization analysis published over the weekend by prominent optimization channel Mustafa Tarawa, shocking database parameters have surfaced proving that Pearl Abyss intentionally stashed some of the absolute highest-refinement weapons and accessory blueprints inside geographical blind spots that standard guide menus completely ignore. From puzzle-gated spears locked behind medieval trap rooms to unique agility daggers embedded in giant open-world wildlife remains, players are completely transforming their character scaling before ever reaching conventional late-game thresholds. The resulting telemetry race across r/CrimsonDesert and specialized strategy Discord networks has triggered a massive debate surrounding developer design philosophy versus pure exploratory exploitation.
The Companion Locked powerhouses: Parval Greatsword and Sigraman Axe
The primary flashpoint generating intense discussion among high-level theory-crafters centers on Pearl Abyss’s highly calculated decision to embed top-tier heavy armaments locked explicitly to secondary party allies. For months, optimization rings debated whether companion characters could out-scale primary builds. Title Update Version 1.12 telemetry data has officially broken that debate.
According to verified layout metrics, the absolute pinnacle of heavy-slashing scaling is achieved by securing the massive Parval Greatsword, located within the high-security limits of the Dlesia (Delacia) Equipment Shop [05:45, 05:52]. This colossal two-handed weapon is hard-gated under character-locked parameters, usable strictly by the vanguard Damiane [05:57, 06:04]. When pushed to its absolute Level 10 refinement ceiling, the sword registers an immense 41 flat attack power alongside an un-nerfed Level 3 Critical Rate modifier, triggering immense community frustration that the primary character Kliff is mechanically barred from exploiting its animation frames [06:04, 06:23].
Simultaneously, hybrid-heavy players are targeting the Poon region to isolate the Sigraman Great Axe, a brutal two-handed armament restricted entirely to the mercenary Oongka (Anka) [06:30, 06:39]. The asset is stashed inside a hidden mountain fissure situated immediately adjacent to a towering, atmospheric giant alien statue [06:39, 06:45].
At maximum refinement loops, the Sigraman Axe unloads 39 raw damage backed by a broken Level 4 Critical Rate bracket, transforming Oongka into an absolute powerhouse [07:28, 07:35]. Explorers are heavily warned not to leave the alien checkpoint prematurely, as an un-mapped secondary treasure chest is statically placed directly at the foot of the alien structure, providing a secondary cache of pristine materials [07:14, 07:20].
Puzzle-Gated Blades: Frost-Veiled Ruins and Church descents
On the one-handed melee front, the update mapping has pinned the exact coordinates of three hidden blades that drastically shift early-game combat efficiency.
The first is the Vow of the Dead, a unique two-handed spear buried within the hazardous Frost Veiled Castle ruins in the Pyoon region [00:28, 00:35]. Navigating past automated traps brings players to a security cell where the spear sits locked behind thick iron bars [00:47, 01:01]. Operators can instantly trigger an environmental bypass by using an open flame to ignite nearby braziers, causing the security bars to slide open automatically [01:01, 01:08].
The secondary tracking node leads directly into the main hall of the Church of Delacia (Dlesia) to claim the mysterious Nazk Sword [01:38, 01:45]. To expose the asset, players must locate two distinct unlit candle pillars near the center nave and illuminate them simultaneously [01:51, 01:58]. This action forces an elevated secret mechanical platform to descend from the cathedral vault ceilings, carrying a treasure chest loaded with the blade [01:58, 02:04]. At max refinement, the Nazk Sword delivers 35 attack power and an inherent Level 1 Attack Speed multiplier [02:19, 02:26].
The blade matrix is reinforced by the Red Rage Sword, stashed inside a deep sub-surface mining complex operating within the Poon territory [02:33, 02:47]. The Red Rage hits a 31 attack ceiling at high refinement but offers a broken flat Level 4 Critical Rate increment, making it the premier choice for fast-striking physical crit builds [03:04, 03:11].
The Waterfall Mage Core and the Whale Carcass Theft
For players utilizing specialized magic configurations, Version 1.12 maps isolate the long-lost Sorcerer Staff [03:18, 03:27]. Tucked deep inside a cave mesh hidden entirely behind a massive cascading waterfall landmark on the border junction separating Demenis and Hernand, entry forces an immediate combat trigger against a localized cave Mini-Boss [03:34, 03:52].
Conquering the entity exposes a lantern-gated iron blockade; lighting the surrounding lantern arrays clears the path to the chest [04:09, 04:15]. At Level 10 refinement, the staff reaches 35 raw output, coupled with Level 2 Critical Rate and Level 1 Attack Speed, completely cementing it as the premier casting tool for rapid spell manipulation [04:25, 04:33].
Concurrently, a massive wave of viral focus has targeted the Alabaster Dagger heist loop [04:43]. Positioned along the shoreline stretching between Deminis and Dlesia, this weapon discards traditional chests entirely [04:43, 04:53]. Instead, explorers must locate a massive, decomposing whale carcass washed up on the sand meshes and extract the Alabaster Dagger which sits stabbed directly into the dead mammal’s flesh model [04:59, 05:07]. The dagger provides deep agility frames, making it mandatory for stealth and high-velocity physical burst chains [05:13, 05:19].
Minting the Pywel Mint: Hedgehog Apples and the Spire of Insight
The final and most economically destabilizing loop uncovered involves an elite, industrial-grade methodology to print pristine Gold Bars automatically [09:04]. Under vanilla parameters, gold bars are strictly gatekept, low-probability drops. The new method entirely subverts this economy through a multi-layered material exploit [09:04, 09:11].
The loop requires combining two primary commodities: Golden Apples and Gold Ore [09:11, 09:35]. To secure the fruits, players travel to the fields neighboring Delicia and track unique, specialized Golden Apple Hedgehogs roaming the grass lines [09:11, 09:18]. By hitting the hedgehogs with specific low-damage physical inputs, players force the animals to drop their golden fruit assets [09:18, 09:27]. Operators can instantly loop this mechanic by fast-traveling out of the sub-zone and immediately returning to completely reset the hedgehog spawn algorithms indefinitely [09:27, 09:35].
This is paired with high-yield Gold Ore nodes which carry a rigid 7-day in-game server respawn cooldown [09:35, 09:41]. Once both components are heavily stockpiled, players travel to the Spire of Insight, solving an advanced structural puzzle to reach the building’s third floor to loot the official Gold Bar Recipe Blueprint [09:41, 10:08]. Taking the manual and materials to any global Witch Hermit cauldron allows players to forge infinite gold bars, granting unchecked wealth to clear out elite black market inventories instantly [07:19, 10:19].
The Chapter 8 Vault Hoard
The high-yield farming map concludes by isolating the game’s single richest chest route [07:49]. Sealed inside a major structural complex tied explicitly to Chapter 8 narrative milestones, this single territory packs more than 30 high-tier treasure chests crammed into a narrow spatial grid [07:49, 07:56].
Strategy subreddits are actively attempting to salvage an un-patched teleportation glitch that previously allowed operators to bypass the story completion locks to farm the entire 30-chest array repeatedly, though recent micro-patch logs suggest the studio’s database division is moving aggressively to seal the boundary loopholes permanently [08:09, 08:23].
For the millions of mercenaries current carving their path across Pywel, the directive from top-tier guilds is absolute: halt your story progression, raid the Dlesia shops, stab the whale remains, make the hedgehogs drop their fruit, and claim your high-refinement weapons before future server maintenance hotfixes rewrite the internal physics of the sandbox [04:59, 09:18].