Introduction to the Ultimate Weapon Build
In the unforgiving world of Oblivion Remastered on Master difficulty, enemies like the DRI Prince of Destruction, boasting 1,000 health (effectively 6,000 due to the 1/6th damage reduction), pose a formidable challenge. Yet, with the right weapon setup, you can obliterate even the toughest foes with ease. This guide unveils a game-changing build that delivers over 12,000 damage per hit, capable of defeating the DRI Prince and even the second-toughest enemy, the Goblin Warlord, in just a few strikes. Astonishingly, this setup is achievable at level one without cheats or glitches, making Master difficulty not only playable but conquerable. Whether you’re a newcomer or a seasoned adventurer, this build will transform your gameplay, allowing you to dominate the game’s most daunting enemies.
Understanding the Challenge of Master Difficulty
Master difficulty in Oblivion Remastered is brutal. Your damage output is reduced to a mere 1/6th of its normal value, turning every enemy into a tank. The DRI Prince of Destruction, with his effective 6,000 health, is the ultimate test of your build’s power. The Goblin Warlord, the game’s second-toughest enemy, is no slouch either, requiring significant damage to bring down. However, with the weapon setup detailed here, you’ll cut through these foes like a hot knife through butter, dealing thousands of damage per hit and making even the most grueling battles feel effortless.
Step 1: Acquiring Glow Dust for the DRI Quest
To craft the ultimate weapon, you first need the DRI Artifact of Unlimited Power, known as Azura’s Star. This requires completing a DRI quest, which begins with obtaining Glow Dust. You can purchase Glow Dust in the Imperial Market District at shops like The Main Ingredient, The Gilded Carafe, or The Emporium, where it’s typically in stock. At The Main Ingredient, located on the edge of the Market District, you can haggle to get it as cheaply as possible. While there, grab a Cure Disease Potion to protect against vampirism later in the quest.
Alternatively, you can acquire Glow Dust for free at the Bruma Mages Guild, located in the north of the map. Inside the guild, head left and downstairs to the living quarters. If you haven’t joined the Mages Guild, the door may be locked, but you can join for free by speaking to an NPC at the guild. Once inside, find a table in the last room on the left with alchemy ingredients, including Glow Dust. If you’re a guild member, taking it isn’t considered stealing; otherwise, ensure no one is watching to avoid trouble.
Step 2: Starting the Azura’s DRI Quest
With Glow Dust in hand, head to Shrine of Azura, located northwest of the map. From Cheydinhal’s main gate, travel north past Lake Arrius and up the mountain path to reach the shrine. You must be at least level 2 to start this quest, so if you’re level 1, sleep in a bed to level up. At the shrine, speak to the Dark Elf in front of it to begin the quest. To gain his trust, either bribe him with gold or play the persuasion minigame, focusing on Admire or Boast for the large segments and avoiding what he dislikes. Once he trusts you, he’ll instruct you to offer Glow Dust at the shrine between 5:00 AM and 7:00 AM (dawn) or 5:00 PM and 7:00 PM (dusk).
Make the offering at the specified time, and Azura will assign you a quest to clear the Gutted Mine, located southwest of the shrine. Save your game before entering, as the mine is filled with vampires who can infect you with vampirism. Jump over traps to trigger them on enemies, then retreat to let the traps do the work. After defeating the vampires, use the Cure Disease Potion immediately to prevent vampirism, which takes days to manifest but requires a lengthy quest to cure if ignored.
Inside the mine, check the local map for a marked secret passage that bypasses traps, leading to a stone wall you can pass through to eliminate remaining vampires. You’ll also find silver ore veins and leveled loot—modest at level 2 but lucrative at higher levels. Another secret area, marked on the map, is accessible by activating wooden boards to reveal an old coffin with leveled gold. A note on one vampire’s body reveals they were Azura’s followers who contracted vampirism while defeating the legendary vampire Dratic, explaining why Azura seeks their release.
Return to the shrine to receive Azura’s Star, a reusable soul gem that never breaks when enchanting or recharging weapons. This artifact is the cornerstone of your ultimate weapon build.
Step 3: Unlocking Enchantment Spells
To enchant your weapon, you need specific spell effects, which must be unlocked by casting them at least once. Fast travel southwest from the Imperial City to Skingrad, entering via the western gate. Cross the bridge, climb the northern rocks, and head to the Skingrad Mages Guild, ideally around 10:00 AM when merchants are available. While there, join the Mages Guild by speaking to Adriana (in the blue dress) to take items without stealing, including alchemy equipment you can sell for early-game gold.
At the guild, purchase the following spells:
From Vigge the Cautious (in the purple fur coat): Weakness to Magicka for 420 gold (haggle for a lower price).
From Sulinus Vassinus: Soul Trap, Weakness to Shock, Weakness to Frost, and Weakness to Fire. Also, buy a cheap Shock spell and Hailstone (Frost) spell. You already know a Fire spell from the game’s start.
If you lack gold, refer to my unlimited gold guide (linked in the original video description) for a duplication glitch to amass millions quickly. Ensure merchants are available by waiting until 10:00 AM if they’re busy.
Step 4: Accessing the Enchanting Altar
To enchant your weapon, unlock the enchanting altar at Frostcrag Spire, a wizard’s tower northeast of Bruma. Follow the mountain paths to reach it, as jumping is inefficient. The front door is locked, but a key is in a chest near an abandoned campsite to the left of the tower. Inside, read the book on the Icy Claw to start a quest to furnish the tower. Fast travel to the Imperial City Market District, visit the Mystic Emporium, and buy a Candles Box (2,000–3,000 gold) for the enchanting altar. If funds are low, use the unlimited gold method. Return to Frostcrag Spire, activate the altar with the Candles Box, and you’re ready to enchant.
Step 5: Capturing a Grand Soul
A Grand Soul is required for the enchantment. Cast Soul Trap on enemies like Gloom Wraiths, Liches, Minotaur Lords, or Xivilai (or Ogres at level 21+) and kill them within the spell’s duration to capture their soul in Azura’s Star or a Grand Soul Gem. Alternatively, buy a Summon Xivilai or Summon Lich spell from Borissean at the Arcane University, summon the creature, cast Soul Trap, and kill it to capture a Grand Soul.
For an easier method at level 1, steal a pre-filled Grand Soul Gem from the Arcane University’s main hall. At 11:00 PM to midnight, sneak to a locked display cabinet on the left. Wait for the lone NPC to look away, or use a Weak Invisibility Potion from the Mystic Emporium to lockpick undetected. The lock is challenging, but my lockpicking guide or the unbreakable Skeleton Key guide (linked in the original video) can help. As a Mages Guild member, taking the gem isn’t stealing. Duplicate it using the duplication glitch for multiple Grand Souls.
Step 6: Crafting the Ultimate Weapon
Choose a one-handed blade, preferably a dagger like the Dribound Dagger (obtainable at level 1 via a glitch), for its fast attack speed. At Frostcrag Spire’s enchanting altar, add the dagger and a Grand Soul Gem (or Azura’s Star) with a Grand Soul. Create the enchantment in this order:
Soul Trap: Magnitude 1, Duration 1 second. Captures the enemy’s soul on kill to recharge the weapon.
Shock Damage: Magnitude 10, Duration 1 second. Deals 10 shock damage per hit, chosen for its effectiveness against most enemies.
Weakness to Shock: Magnitude 100%, Duration 3 seconds. Amplifies subsequent shock damage.
Weakness to Magicka: Magnitude 100%, Duration 3 seconds. Boosts all magical effects, including shock damage.
The 3-second duration allows time to block, heal, or stagger between hits while stacking weaknesses. Each hit amplifies the next, creating a snowball effect. By the 10th hit, you deal 1,000 shock damage, totaling 3,850 damage—enough to kill most enemies. With Azura’s Star, you recharge the weapon indefinitely.
For even higher damage, increase Shock Damage to 20 (reducing charges to 21 from 29) to kill the DRI Prince faster. Alternatively, craft a touch spell at Frostcrag Spire with Weakness to Shock (100%) and Weakness to Magicka (100%) for 10 seconds. Casting this before attacking quadruples damage, dealing 26,000 total damage after 10 hits (or 51,880 with 20 shock damage after 12 hits). This obliterates any enemy in under 10 seconds.
Conclusion
This ultimate weapon build transforms Master difficulty into a playground, letting you deal over 12,000 damage per hit at level 1 without cheats. By acquiring Azura’s Star, unlocking key spells, and crafting a perfectly enchanted dagger, you’ll decimate the DRI Prince of Destruction and beyond. Pair this with my damage immunity guide for a truly unstoppable character. Dive into Oblivion Remastered and unleash your power—happy hunting!
News

THE CIRCLE CLOSES: ‘Outlander’ Season 8, Episode 7 Unveils the Cosmic Truth Behind Jamie and Claire’s Union
THE GHOST IN INVERNESS: THE 30-YEAR MYSTERY IS FINALLY SOLVED! 🏴⏳ Hold onto your kilts, Sassenachs! The latest leaks from Season 8, Episode 7 just dropped a truth bomb that changes EVERYTHING we thought we knew about that Jamie’s ghost…

A FRAGILE PEACE: ‘The Last Thing He Told Me’ Season 3 Prospects and the Fallout of the Campano Dynasty
OWEN IS BACK, BUT THE NIGHTMARE IS JUST BEGINNING! 🕵️♂️💔 The Season 2 finale just dropped, and that “bargain” with Quinn is already blowing up on the internet! Did Hannah just trade one prison for another? Apple TV+ hasn’t officially…

THE CASE ISN’T CLOSED: ‘High Potential’ Season 3 Confirmed Amidst Heartstopping Finale and Major Cast Shakeups
IS CAPTAIN WAGNER REALLY GONE?! THE CLIPHANGER THAT BROKE THE INTERNET 😱🩸 ABC just confirmed Season 3 is officially happening, but at what cost? After that brutal “Family Tree” finale, fans are spiraling over Morgan’s blood-stained discovery. Wait until you…

BEYOND THE AISLE: Why ‘Something Very Bad Is Going to Happen’ Season 2 is Rewriting the Slasher Playbook
THE WEDDING FROM HELL IS JUST THE BEGINNING… 👰🩸 If you thought the Season 1 finale was a bloodbath, you are NOT ready for the reality-shattering twist Netflix just greenlit for Season 2! The “Final Girl” isn’t who you think…

THE POGUES’ LAST STAND: ‘Outer Banks’ Season 5 Official Release Window and Croatia Set Leaks Reveal a Deadly Finale
THE END OF AN ERA: THE POGUES’ FINAL RIDE IS HERE! 🌊💔 Everything we’ve feared is coming true—Netflix just dropped the ultimate bombshell on the final chapter of the OBX saga. If you thought JJ’s sacrifice was the end, you…

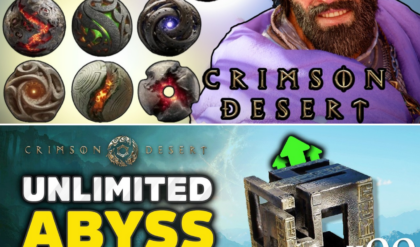
“A CLONE OF ONE’S OWN”: TOP 5 ABYSS GEARS REVEALED AS CRIMSON DESERT PLAYERS OPTIMIZE FOR THE ULTIMATE BOSS GAUNTLET
THE ABYSS GEAR TIER LIST: BECOME UNSTOPPABLE AFTER 200 HOURS! ⚔️🌪️ I’ve officially clocked over 200 hours in Crimson Desert, cleared every boss, and finished every quest. If you’re still using default gear, you’re leaving 50% of your power on…
End of content
No more pages to load