12 Pro Tips to Master Combat in Clair Obscur: Expedition 33
Clair Obscur: Expedition 33 redefines turn-based RPGs with its reactive combat system, blending strategic skill selection with real-time dodging, parrying, and aiming. Set in a Belle Époque-inspired world, the game challenges players to lead Gustave, Lune, and their party against the Paintress and her deadly Nevrons. Combat is both stylish and punishing, demanding precise timing, resource management, and party synergy. Whether you’re struggling with early fights in Spring Meadows or preparing for endgame bosses in New Game+ (NG+), these 12 pro-level tips will help you master combat like a seasoned Expeditioner.

1. Prioritize Dodging Over Parrying Early
The game’s real-time defensive mechanics—dodging, parrying, and jumping—are central to survival. Parrying, which refunds 1 Action Point (AP) and triggers a counterattack, requires pinpoint timing, especially on Expeditioner or Expert difficulty. Dodging, however, has a wider timing window, making it ideal for beginners or when facing unfamiliar enemies.
Pro Tip: Equip the Dodger Lumina (available from Gestral traders in Act 1) to gain 1 AP per perfect dodge, matching parry’s AP reward with less risk. Practice against Portiers in Spring Meadows to learn attack animations. As you improve, transition to parrying for bosses like Eveque, where the counterattack can shift momentum. Adjust difficulty to extend timing windows if needed.
2. Exploit Elemental Weaknesses
Every enemy has elemental weaknesses and resistances, displayed in the battle UI after attacking. Ignoring these wastes AP and prolongs fights. Lune’s elemental skills (Immolation for Fire, Electrify for Lightning, Ice Lance for Ice) are perfect for probing weaknesses early.
Pro Tip: Always equip two elemental skills per character to cover varied weaknesses. For example, Nevrons in Flying Waters are often weak to Lightning, so use Lune’s Electrify followed by Thunderfall. Check “Weak” or “Resist” pop-ups to tailor your attacks, and avoid spamming resisted elements. Pair with Maelle’s Virtuose Stance to apply Burn, amplifying Lune’s Thermal Transfer.
3. Master the Break Meter
Enemies have a Break meter (yellow bar below health) that fills with damage. When full, Break skills (Gustave’s Overcharge, Maelle’s Fleuret Fury, Lune’s Earth Rising) stun the enemy for a turn and reduce their defense, making them vulnerable to high-damage skills.
Pro Tip: Use multi-hit skills like Gustave’s Lumière Assault or Maelle’s Fleuret Fury to fill the Break meter quickly. Target weak points with Free Aim shots to accelerate buildup. For bosses, Break them, then unleash Lune’s Wildfire or Verso’s Marking Shot for massive damage. Timing Breaks before enemy ultimates can skip deadly mechanics.
4. Use Free Aim Shots Strategically
Free Aim shots, costing 1 AP per bullet, target enemy weak points (glowing blue) or environmental hazards for bonus damage. Mindlessly unloading clips drains AP, leaving you unable to use skills.
Pro Tip: Fire one or two shots to hit weak points or apply status effects, then follow with a skill. Equip Marking Shots Lumina to apply Marks, boosting damage for allies like Verso, who gain AP when hitting Marked targets. Against flying enemies (e.g., Demineurs), use Free Aim to interrupt dodges, and target mines in Flying Waters for AoE explosions. Save AP for Break skills or ultimates.
5. Manage AP Like a Resource
AP fuels skills and Free Aim shots, but high-cost skills (Hell, Overcharge) can deplete it quickly. Basic attacks generate AP, but relying on them weakens your output.
Pro Tip: Start with low-AP skills (Electrify, Strike Storm) to build AP, then use high-cost skills for finishers. Equip Dead Energy (Act 1 drop) for 3 AP per enemy kill and Energising Start for 1 AP at battle start. Lune’s Thermal Transfer generates 4 AP against Burning enemies without ending her turn, ideal when paired with Maelle’s Burn skills. Perfect dodges with Dodger also refund AP.
6. Sequence Lune’s Stains for Maximum Impact
Lune’s Stain system generates elemental Stains (Fire, Ice, Lightning, Earth, Light) with each skill, which can be consumed to amplify subsequent skills. Mismanaging Stains wastes her potential.
Pro Tip: Use Elemental Trick to generate one of each Stain, setting up Elemental Genesis for massive AoE damage. Generate Light Stains with Immolation or Healing Light for flexibility, as they substitute for any element. For example, use Immolation (Fire Stain), then Thunderfall (consumes Fire Stain) for boosted Lightning damage. In endgame, use Scaverim to generate Dark Stains, amplifying skills by up to 300%.
7. Leverage Maelle’s Stance System
Maelle’s stance system (Virtuose, Offensive, Defensive) alters her combat role. Virtuose Stance multiplies damage but lasts one attack, Offensive boosts damage but increases vulnerability, and Defensive reduces damage taken and rewards parries with AP.
Pro Tip: Use Virtuose Stance with Pyrolyse to stack 60 Burn stacks, especially with Medalum and Double Burn Lumina. Switch to Defensive Stance against hard-hitting bosses to survive and generate AP via parries. Equip Cheater Lumina to extend Virtuose Stance for another attack, maximizing Burn damage. Alternate stances based on enemy patterns.
8. Build Party Synergy
Your active party (three characters) must complement each other. A poorly balanced team struggles against varied enemies. Gustave, Lune, and Maelle form a strong early-game core, but later characters like Verso and Monoco add depth.
Pro Tip: Use Gustave to Mark and Break, Lune for elemental damage and healing, and Maelle for Burn and single-target DPS. In Act 2, add Verso for Marking synergy (Rewarding Mark Lumina grants AP on Marked targets) or Monoco for speed buffs with Joyaro. Level relationships via camp conversations to unlock Gradient Attacks at levels 4 and 7, dealing massive damage. For NG+, pair Lune with Sciel’s Fortune’s Fury for double damage.
9. Rotate Pictos and Luminas
Pictos provide stat boosts and effects (e.g., Critical Burn: +25% critical chance on Burning enemies). After four battles, a Picto’s effect becomes a Lumina, equippable without a Picto slot. Beginners often stick to initial Pictos, missing versatile builds.
Pro Tip: Equip new Pictos until they become Luminas, then swap for unlearned ones. Use Colours of Lumina (found via exploration) to expand Lumina slots at camp. Prioritize Dodger, Dead Energy, Burning Shots (20% Burn chance on Free Aim), and Cheater (extra turn after ultimates). In NG+, stack Burn-enhancing Luminas (Burn Affinity, Critical Burn) for Maelle and Lune.
10. Ambush for First Strikes
Initiating combat with a First Strike (RB on Xbox when approaching enemies) gives your party the first turn, critical against multiple enemies or bosses. Getting ambushed lets enemies act first, often applying buffs or heavy damage.
Pro Tip: Approach enemies cautiously in the overworld, timing your First Strike to avoid mistimed engagements. In tight areas like Flying Waters, use Esquie’s traversal (unlocked via missing rocks) to reposition for ambushes. First Strikes let Lune set up Stains or Maelle apply Burn early, dictating the fight’s pace.
11. Use Consumables Freely
Hoarding consumables like Healing Tints or Chroma Elixirs complicates fights. Chroma Elixirs heal outside combat and refresh at Expedition Flags, while Healing Tints are plentiful via exploration.
Pro Tip: Use Chroma Elixirs to heal between fights without respawning enemies. In battle, deploy Healing Tints to avoid wipes, especially against bosses. Flags are frequent, so don’t hesitate to use consumables before major encounters. Equip Energetic Healer Lumina to gain AP when healing, maintaining momentum.
12. Practice Against Optional Fights
Optional battles, like Mimes or Chromatic bosses in Danger zones, are tough but offer practice and rewards (weapons, Pictos). Beginners often skip these, missing combat mastery opportunities.
Pro Tip: Fight the Mime near the Harbour in the prologue for a music record and counter practice. Return to Danger zones in Act 2 with better gear (Lighterim for Lune, Clierum for Maelle). Use these fights to perfect dodging, parrying, and Stain combos. If overwhelmed, flee (Battle Wheel option) and return later—there’s no penalty for retreating.
Conclusion
Combat in Clair Obscur: Expedition 33 is a thrilling blend of strategy and reflexes, rewarding players who master its systems. By prioritizing dodging, exploiting weaknesses, managing AP, and leveraging party synergy, you’ll dominate fights from Spring Meadows to NG+ superbosses. Experiment with Lune’s Stains, Maelle’s stances, and Pictos to tailor your playstyle, and don’t shy away from optional battles to hone your skills. With these 12 pro tips, you’re ready to lead Expedition 33 to victory against the Paintress. Sharpen your reflexes, rally your party, and conquer the Continent!
News

“A CLONE OF ONE’S OWN”: TOP 5 ABYSS GEARS REVEALED AS CRIMSON DESERT PLAYERS OPTIMIZE FOR THE ULTIMATE BOSS GAUNTLET
THE ABYSS GEAR TIER LIST: BECOME UNSTOPPABLE AFTER 200 HOURS! ⚔️🌪️ I’ve officially clocked over 200 hours in Crimson Desert, cleared every boss, and finished every quest. If you’re still using default gear, you’re leaving 50% of your power on…

“CRIME PAYS IN PYWEL”: CRIMSON DESERT PLAYERS DISCOVER BRUTAL NEW XP FARMS AND ARTIFACT GLITCHES
UNLIMITED SKILL POINTS: BECOME A GOD IN PYWEL OVERNIGHT! ⚡🔥 If your skill tree is looking a bit empty, you’re doing it wrong. I’ve discovered three broken farming methods that will flood your inventory with Abyss Artifacts and skyrocket your…
“PEACE IS FLEETING”: PEARL ABYSS UNVEILS MASSIVE CRIMSON DESERT ROADMAP WITH BOSS REMATCHES AND OUTPOST RE-INVASIONS
THE PYWEL REVOLUTION IS HERE: CRIMSON DESERT WILL NEVER BE THE SAME! 👑🔥 Pearl Abyss just dropped a developer update that is going to blow your mind. Starting THIS month and rolling out through June, Crimson Desert is transforming from…
“VISUAL BUG” VANDALISM: CRIMSON DESERT PLAYERS FORCED TO REBUILD AFTER INFAMOUS “DOUBLE CRIT” MYTH DEBUNKED
THE “DOUBLE CRIT” LIE: STOP RUINING YOUR BUILDS! 😱🚫 If you’re still stacking Crit on your necklace and Cuckoo Flame Armor thinking you’re getting “Double Crit” damage—stop. Extensive testing has officially confirmed it’s nothing but a visual bug. You’re sacrificing…
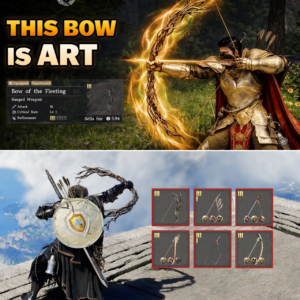
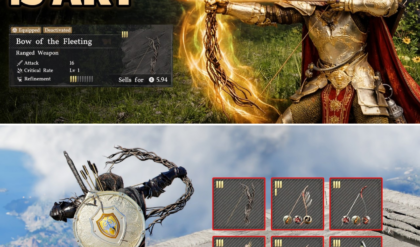
“BEAUTY AT A BLOODY PRICE”: CRIMSON DESERT PLAYERS GRIND THROUGH CRIMINAL UNDERWORLD FOR THE RARE BOW OF THE FLEETING
THE MOST BEAUTIFUL WEAPON IN PYWEL… BUT IT’S A TOTAL NIGHTMARE TO UNLOCK! 🏹✨ I’ve finally found it: the Bow of the Fleeting. It is hands-down the most stunning piece of gear in all of Crimson Desert, but getting your…

“NOT AN ANIMUS GLITCH”: CRIMSON DESERT PLAYERS RECREATE ICONIC ASSASSIN’S CREED LOOK WITH HIDDEN ARMOR SETS
CRIMSON DESERT OR ASSASSIN’S CREED? YOU DECIDE! 🦅🗡️ I don’t even know what game I’m playing anymore, but the drip in Pywel just hit a whole new level. I’ve found the exact armor pieces and dye combinations to turn Cliff…
End of content
No more pages to load