Monster Hunter Wilds: How to Beat Arena Rathian, Best Loadout, Everything You Need to Know
Monster Hunter Wilds has taken the hunting world by storm, and its Arena quests push even veteran hunters to their limits. The Arena Rathian quest, introduced in Title Update 1, is a high-stakes challenge where you face the iconic Flying Wyvern in a confined space with a tight 5:30 timer for A-Rank rewards. With predetermined loadouts and no custom gear, this fight tests your raw skill, weapon mastery, and knowledge of Rathian’s moves. Whether you’re aiming to farm Rathian Coins for the Clerk α armor or chasing leaderboard glory, this guide covers the best loadout, strategies, and tips to dominate the Arena Rathian in Monster Hunter Wilds. Let’s dive into everything you need to know to slay this Queen of the Land.
Understanding the Arena Rathian Challenge
The Arena Rathian quest is a High-Rank hunt in Wounded Hollow, accessible after reaching Hunter Rank 16 and unlocking the Grand Hub in Suja by completing Chapter 4-3. Speak to Ricardo at the Arena Quest Counter to start it. Unlike open-world hunts, Arena quests force you to choose from three premade equipment sets, limiting your flexibility but leveling the playing field. Your goal is to slay Rathian as fast as possible, with rankings based on clear time:
A-Rank: Under 5:30 (4 bonus reward slots, unlocks Earrings of Dedication α)
B-Rank: Under 10:00 (2 bonus reward slots)
C-Rank: Over 10:00 (base rewards only)
Rewards include Rathian Coins (for crafting Clerk α armor) and Pinnacle Coins, with better ranks yielding more. The quest is balanced for two players but scales for solo play, though solo A-Ranks are tougher due to lower damage output. You can bring a Support Hunter (Rosso) to split aggro and provide buffs, which is highly recommended for solo runs.
Rathian herself is a familiar foe, with a moveset that includes fireballs, poison tail flips, and charges. The arena’s tight space amplifies her threat, as dodging her sweeping attacks is trickier, and her frequent flying can waste precious seconds. Success hinges on choosing the right loadout, exploiting her weaknesses, and minimizing downtime. Let’s break it down.
Rathian’s Moveset and Weaknesses
Before picking a loadout, know what you’re up against. Rathian’s key moves in the arena include:
Fireball: Spits one to three fireballs, inflicting Fireblight. Dodge sideways and target her mouth post-attack, as it becomes a weak point (red glow in Focus Mode).
Poison Tail Flip: Flies up, somersaults, and whips her tail, dealing Poison. Roll under her or to the side; severing her tail with slashing weapons reduces its range and removes Poison.
Tail Swipe: Spins with her tail while grounded, hitting a wide arc. Stay near her legs or roll backward.
Charge: Runs forward up to three times, often roaring first. Sidestep or use an Offset Attack (sword icon in Focus Mode) to counter.
Bite: Snaps forward, preceded by raised wings. Roll back or position under her.
Aerial Maneuvers: Flies to reposition or whip her tail. Use Flash Pods to knock her down.
How To Defeat Arena Rathian
Rathian Weaknesses


Weaknesses:
Elements: Dragon is best, hitting all parts with 2-star effectiveness (Thunder is good for the head but weaker elsewhere). Avoid Fire, as she’s immune.
Damage Types: Sever and Blunt are equally effective. Focus on her head (highest damage), wings (breakable twice), and tail (severable). Legs are decent but less optimal.
Status: Susceptible to Sleep, Paralysis, and KO (from Blunt). Use these to create openings.
Items: Flash Pods, Shock Traps, and Vine Traps work well. Bring Antidotes for Poison and Nulberries for Fireblight.
Arena-Specific Tips:
The Wounded Hollow arena has pillars Rathian can crash into during mounts, dealing ~550 damage (solo: ~360). Mount her head to steer her into pillars.
A gate can be raised to trap Rathian on one side, limiting her movement but risking cramped dodging.
No endemic life (like Flashflies) spawns, so rely on your loadout’s items.
Best Loadout: Set B (Switch Axe / Charge Blade)
You get three equipment sets, each with two weapons, mixed armor, and consumables (all include 10 Potions, 10 Mega Potions, 2 Max Potions, 10 Rations). Here’s the breakdown:
Set A: Sword & Shield / Hammer
Set B: Switch Axe / Charge Blade
Set C: Gunlance / Gunlance
Recommended: Set B (Switch Axe main, Charge Blade sub)
Why Set B?
Switch Axe: Fast, mobile, and deals high Sever damage. Its Dragon-element Chthonian Flame line exploits Rathian’s weakness, and Morph Slash combos (Axe to Sword) maintain pressure. Community feedback on Steam and Reddit praises Switch Axe for sub-4:00 clears, with one user reporting a 3:58 solo time.
Charge Blade: Also Dragon-element, with strong burst via Impact Phials. It’s slightly slower but safer for casual play, clearing in ~4:30 with conservative strategies. Switch to it if you prefer guard-heavy play.
Armor Skills: Set B includes Attack Boost, Focus, and Weakness Exploit, boosting damage on Rathian’s head and speeding up Switch Axe’s gauge or Charge Blade’s phials.
Items: Includes Flash Pods (3), Shock Traps (2), Vine Traps (2), Antidotes (5), Nulberries (5), Sleep Knives (3), and Paralysis Knives (3). These maximize control and openings.
Set B Details:
Weapons:
Switch Axe: Chthonian Flame (Dragon, high sharpness, Sever focus)
Charge Blade: Chthonian Flame (Dragon, Impact Phials)
Armor:
Head: Rathian Helm α (Attack Boost 2)
Chest: Anjanath Mail α (Focus 2)
Arms: Rathalos Vambraces α (Weakness Exploit 2)
Waist: Diablos Coil α (Attack Boost 1)
Legs: Odogaron Greaves α (Critical Eye 1)
Consumables (beyond standards):
1 Might Seed (3-min Attack +10)
1 Ghillie Mantle (temporary invisibility for Sneak Attacks)
3 Barrel Bombs (for Sleep bombing)
Status Knives and Traps (as listed)
Alternatives:
Set A (Hammer): Great for Blunt damage and KOs. Aim for the head to stun Rathian, then land Big Bang combos. Slower movement makes dodging harder, but a Reddit user cleared in ~5:00 after learning Hammer’s rhythm. Good for solo if you’re Blunt-savvy.
Set C (Gunlance): High defense, decent damage with Might Seed. Best for Sleep bombing (use one Barrel Bomb per Sleep for two bombs total). A Steam post noted a 4:58 clear with Gunlance, leveraging pillar crashes. Pick this if you like tanky play.
Set A (Sword & Shield, Multiplayer): With a friend, pair SnS with Hammer. SnS uses Shield Bashes for stuns and targets wings/tail, while Hammer pounds the head. Optimized duo runs can hit sub-5:00 easily.
Why Not Others? Sword & Shield struggles solo due to lower DPS, and dual Gunlance feels clunky for fast clears unless you master Sleep bombing. Switch Axe’s mobility and damage make it the most consistent for A-Rank.
Step-by-Step Strategy to Beat Arena Rathian
Here’s how to slay Rathian in under 5:30, tailored for Set B’s Switch Axe (adapt for other weapons):
Preparation (Pre-Fight):
Eat a Meat Platter at the canteen for Attack Up (L) and Polisher (faster sharpening). If unavailable, use 2 Rations and a Max Potion for max health/stamina.
Equip the Ghillie Mantle while running to Rathian for a free Sneak Attack.
Consume the Might Seed (+10 Attack for 3 minutes) just before engaging.
Opening Move (0:00-0:30):
Start with a Sneak Attack on Rathian’s head or tail (use Ghillie Mantle if needed). Switch Axe’s Overhead Slash (R2) deals big initial damage.
Counter her Weak Roar with an Offset Attack (R2+Circle) if possible, staggering her.
Use a Flash Pod if she flies early to ground her, saving time.
Early Phase (0:30-2:00):
Focus on the head with Switch Axe’s Sword Mode (Triangle+Circle to morph). Use Wild Swing (Circle spam) to Axe Mode for quick hits when she moves.
Dodge her Fireballs sideways and punish her mouth with a Focus Strike (L2+R2 when glowing red) to stagger.
If she does a Tail Flip, roll under her and attack her legs or tail to build toward a sever.
Use Sleep Knives (Slinger, aim for head) to put her to sleep once. Place one Barrel Bomb near her head, detonate with a Sword Mode Discharge (Triangle+Circle hold), then combo for ~800 damage.
Mount and Mid-Fight (2:00-3:30):
Build Mount gauge by landing aerial attacks (jump off ledges with R2). When mounted, steer her head into a pillar for ~550 damage (aim for two crashes if RNG allows).
Use a Shock Trap post-mount to lock her down, focusing on the tail to sever it. This removes Poison and shortens her attack range.
If she flies again, use another Flash Pod (you have 3). Save the third for emergencies.
Cure Poison with Antidotes and Fireblight with Nulberries to avoid downtime.
Final Phase (3:30-5:00):
Rathian gets aggressive, chaining Charges and Fireballs. Stay mobile with Fancy Roll (X after attacking) to avoid her sweeps.
Use Paralysis Knives (Slinger) for a 5-7 second lockdown, unloading on her head with Sword Mode combos.
If her tail is severed, prioritize head for max damage. If not, keep chipping at it while dodging.
Use Vine Trap if she’s enraged (glowing eyes) to halt her momentum, giving you a combo window.
Closing the Kill (5:00-5:30):
With ~30 seconds left, go all-in on her head. Use Morph Slash combos (R2 to switch modes) for sustained DPS.
If she’s limping (skull icon on minimap), chase her down and finish with a Focus Strike or heavy combo.
Avoid sharpening or healing unless critical—every second counts.
Multiplayer Variant:
Pair with a Hammer user (Set A). You focus on tail/wings with Switch Axe, while they KO the head. Coordinate Sleep Knives and Traps for shared openings.
Use the gate to split Rathian’s aggro, letting one player recover while the other attacks.
Sub-5:00 is easier with a friend, as you can chain stuns and mounts.
Support Hunter (Solo):
Bring Rosso (press Triangle on Equipment Selection). He splits aggro, uses Recover Ammo to heal, and occasionally staggers Rathian. Don’t rely on his DPS—he’s there for support.
Advanced Tips for A-Rank
Minimize Downtime: Skip unnecessary item use (e.g., extra Potions if Mega Potions suffice). Sharpen only once, using Polisher meal buff to extend sharpness.
Pillar RNG: Mount early to get at least one pillar crash. If Rathian avoids pillars, focus on head damage instead.
Sleep Bombing: Use one Barrel Bomb per Sleep (two total with 3 Sleep Knives) to preserve bombs for a second proc. Detonate with a Slinger shot to avoid wasting combo time.
Offset Attacks: Counter her Charge or Bite with Switch Axe’s Morph Slash for free staggers. Practice timing in Focus Mode.
Flash Pod Timing: Save one Flash Pod for when Rathian chains aerial attacks late in the fight, as flying burns the clock.
Learn Patterns: Rathian’s Fireball (orange glow) and Tail Flip (rearing up) have clear tells. Punish these with head or tail hits.
Restart Quest: If you take a big hit or miss a Sleep bomb, use the “Restart Quest” option to save time (accessible via menu).
Why This Build and Strategy Work
The Switch Axe in Set B is the best loadout due to its Dragon element, high mobility, and synergy with Rathian’s weaknesses. Its fast combos keep her grounded, and Weakness Exploit ensures headshots hit hard. The Ghillie Mantle and status knives create openings no other set matches, while Flash Pods and Traps counter her flying. Community posts on Steam highlight Switch Axe’s ease, with clears as low as 3:58, and Game8 recommends it for solo DPS. Charge Blade is a close second for safer play, but Switch Axe’s speed seals the A-Rank.
Compared to Hammer (great for KOs but slow) or Gunlance (tankier but RNG-reliant), Switch Axe balances aggression and control. Multiplayer with SnS/Hammer is viable but less consistent solo. The strategy—Sneak Attack, Sleep bombing, pillar mounts, and head focus—maximizes damage while shaving seconds off the clock, addressing complaints about Rathian’s “trashy moveset” eating time.
Rewards and Why It’s Worth It
Clearing Arena Rathian grants:
Rathian Coins: 2-4 per clear (A-Rank gives most). Need 10 for Clerk α armor set (20 for both variants), boosting defense and skills like Focus.
Pinnacle Coins: For other arena gear.
Earrings of Dedication α: Unlocked at B-Rank+, a headpiece with Attack Boost for future hunts.
Armorcharm/Powercharm: Grabbed by starting and exiting any Arena quest.
The Clerk α set is stylish and practical, while coins fuel endgame crafting. Leaderboard bragging rights add replay value, though some X users gripe about cheaters inflating times.
Final Thoughts
The Arena Rathian in Monster Hunter Wilds is a fiery test of skill, but with the Switch Axe from Set B, a sharp strategy, and relentless aggression, you can claim A-Rank in under 5:30. Focus on her head, sever her tail, and use every tool—Flash Pods, Sleep Knives, pillar crashes—to control the fight. Whether solo with Rosso or paired with a friend, this loadout and guide ensure you’ll slay the Queen of the Land with time to spare.
So, sharpen your axe, eat a hearty meal, and charge into Wounded Hollow. Rathian’s reign ends now—make her bow to your blade!
News

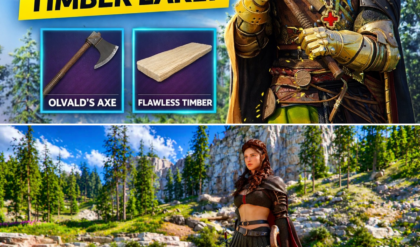
THE LUMBERJACK LEAP: How Crimson Desert Players are Snagging End-Game Wood in Chapter 4
UNLIMITED FLAWLESS TIMBER! 🌲💎 Stop the grind and start the “Hack”! Need that God-tier Shadow Leaf armor or a Grade 9 Bow upgrade? 🏹 Flawless Timber is the rarest wood in Pywel, and most players think it’s locked behind late-game…
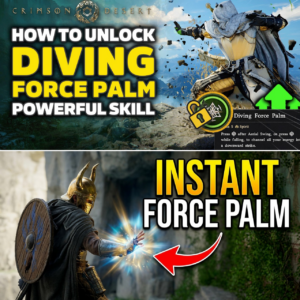
BEYOND THE SKILL TREE: The Secret Odyssey to Unlock Crimson Desert’s Most Iconic Move
UNLOCKED: The “Hidden” God-Tier Move in Crimson Desert! 💥😱 Have you seen that insane aerial AoE slam in the trailers and wondered why it’s not in your skill tree? That’s because Diving Force Palm is HIDDEN behind the most complex…

THE “ICE WALKER” EXPLOIT: How Crimson Desert Players Are Maxing Out Stats in Hours By Gemini News Service | April 17, 2026
LEVEL UP LIKE A GOD! 🚀 Why aren’t you farming the “Ice Walker” yet? Stop the slow grind! 🛑 The community just discovered an “Infinite XP” loop that will max out your Abyss Artifacts in record time—and it’s so easy,…

THE CRIMSON DESERT CURSE: Is Pearl Abyss’s Masterpiece Killing the Western RPG?
IS FABLE OFFICIALLY DOOMED? 😱 Crimson Desert is terrifying the entire RPG industry! The “Gold Standard” has shifted, and Western developers are shaking in their boots! 📉⚔️ While players are spending hundreds of hours in the authentic, high-fantasy world of…
ELEMENTAL ANARCHY: Why Fire is the Undisputed King of the Crimson Desert Meta
STOP PLAYING LIKE A NOOB! 🛑 Your Crimson Desert build is literally DYING without this! Why is every top-tier content creator suddenly “Fire-imbued”? 🔥 The secret is OUT: Elements aren’t just “extra damage”—they are a total game transformation. If you’re…
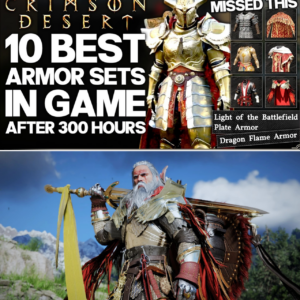
THE ARMOR ARMS RACE: How Crimson Desert’s “Hidden” Gear is Redefining the Pywel Meta
STOP SCROLLING! 🛑 You’ve been playing Crimson Desert WRONG this whole time! Think your current gear is “good enough”? Think again. 📉 The community just uncovered 10 “Hidden” Armor Sets that are literally game-changing—and most players have walked right past…
End of content
No more pages to load