Ever wondered how to turn Atsu into an unstoppable force in the frozen wilds of Ezo?
One wrong step, and you’re buried in snow—or worse, a samurai’s blade. But what if a single armor set could make enemies tremble before you even draw your katana, whispering tales of a vengeful ghost that haunts their nightmares? These 13 hidden gems aren’t just outfits; they’re game-changers that flip the script on stealth, combat, and survival… if you know where to look. Dive into the shadows and claim your edge—full guide with exact locations awaits! 👉
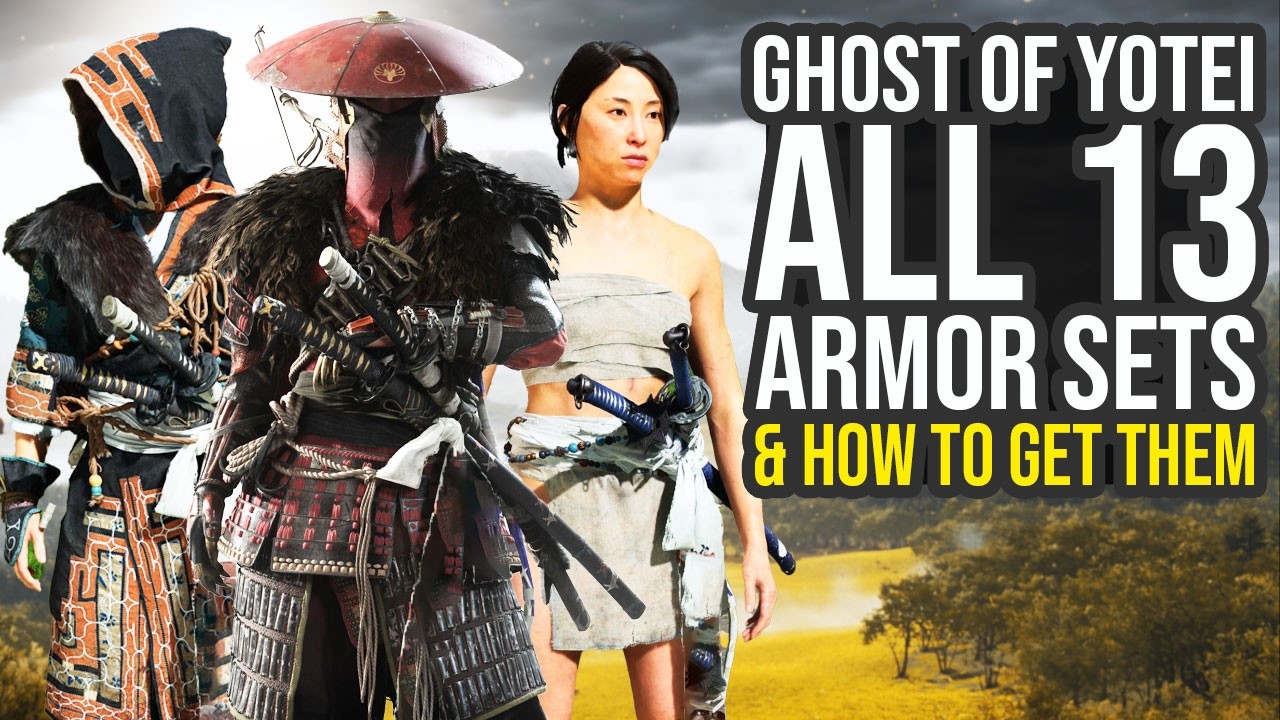
In the brutal, snow-swept landscapes of Ghost of Yotei, developer Sucker Punch Productions has once again delivered a masterclass in open-world samurai action. Released earlier this month on PlayStation 5, the sequel to 2020’s hit Ghost of Tsushima shifts the action to the untamed frontiers of 1603 Hokkaido—known then as Ezo—where protagonist Atsu, a fierce ronin seeking vengeance against the Yotei Six, must carve her path through Mongol invaders, treacherous terrain, and her own haunted past. Amid the game’s poetic storytelling and fluid combat, one feature stands out for its depth: the armor system.
Unlike the dye-focused customization of its predecessor, Ghost of Yotei‘s 13 armor sets aren’t mere aesthetics. Each provides up to three passive perks tailored to specific playstyles—be it ghost-like stealth, aggressive parrying, or survival in the biting cold. These buffs can be upgraded at blacksmiths like Ginji the Armorer, using resources gathered from bounties, exploration, and side quests. Collecting all 13 unlocks the “For All Occasions” trophy, a nod to Atsu’s adaptability in a world that punishes the rigid. Most sets are missable only if you rush the main story, but post-game access ensures nothing is truly lost.
This guide breaks down every armor set, from the starter gear to the elusive Deluxe Edition exclusive. We’ll cover unlock methods, key perks, upgrade paths, and tips on integrating them into your build. Whether you’re a completionist hunting platinum or a casual player tweaking for that perfect duel, here’s everything you need to outfit Atsu like the legend she is. (Note: Spoilers are minimal, but locations tie into quests—proceed with caution if you’re early in the campaign.)
1. Onryo Armor: The Ghost’s Starting Shroud
Available from the outset in Chapter 1, the Onryo Armor embodies Atsu’s spectral identity as the “Wolf of Yotei.” This lightweight set, woven with ethereal fabrics that seem to shimmer in the moonlight, starts as basic ronin garb but evolves into a terror engine through story progression.
Perks (Base):
Enhanced Wolf Summon duration: Call your spectral ally longer to distract foes.
Terror buildup on kills: Defeated enemies spread fear to nearby patrols.
Upgrades: Automatic with main story beats—defeating Yotei Six bosses like the brutal warlord Khotan unlocks tiers. At max level (post-Chapter 5), add a third perk: Ghost Stance extension, letting you chain ethereal dodges indefinitely.
Location: Equipped by default at the tutorial village in Yotei Grasslands. No hunt required, but pair it with the Fox’s Jaw mask (found in a nearby haiku shrine) for full set bonuses.
Best For: Stealth runs and story purists. Early-game, it’s clutch for bamboozling patrols without a single arrow fired. Drawback? Minimal defense against heavy hits—upgrade fast or risk getting staggered in open brawls.
In playtesting, this set shines during the prologue ambush, where its terror perk turns a hopeless skirmish into a symphony of panicked screams. Sucker Punch’s design philosophy here—rewarding narrative investment—makes it feel earned, not handed out.
2. Crimson Kimono: The Enigmatic Wanderer’s Whisper
Hidden behind a chain of environmental puzzles, the Crimson Kimono evokes a tragic poet’s tale, its blood-red silk stained by untold sorrows. This set favors exploration and subtle takedowns, perfect for players who savor Yotei‘s breathtaking vistas over constant swordplay.
Perks (Base):
Reduced noise on footsteps: Sneak through occupied camps undetected.
Guiding Wind affinity: Environmental clues (like fox trails) reveal themselves faster.
Upgrades: Visit Ginji at the Old Inn in Yotei Grasslands. Level 1 requires 5 Iron Ore and 2 Wolf Pelts; higher tiers demand rarer Ainu artifacts from side quests. Maxed out, gain “Echo of the Lost”: Briefly reveal enemy patrol routes after a stealth kill.
Location: In southern Yotei Grasslands, follow the third swarm of red fireflies from the Fox’s Den shrine (unlocked in Chapter 2). They’ll lead to the Old Home ruins—climb the attic for a note, then sculpt a snow fox by the stream. Interact with the grave’s stone pile to claim it. Expect 20-30 minutes of backtracking if you’re not attuned to the winds.
Best For: Completionists mapping Ezo’s 50+ shrines. It’s underwhelming in direct combat but godsend for the “Shadows in the Snow” trophy, which demands 100 silent assassinations. Critics have praised its tie-in to Ainu folklore, adding cultural weight to the grind.
3. Bounty Master Armor: Risk and Reward in Bloodied Leather
For thrill-seekers who live for the parry, this rugged set—adorned with tally marks of fallen foes—turns defense into offense. It’s the armor of the hunter, built for those high-stakes bounty contracts that dot the map.
Perks (Base):
Expanded Perfect Parry window: More forgiving timing on counters.
Extra counterattack chain: Up to three ripostes per successful block.
Upgrades: Ginji handles this one, but bounties must be active for materials like Bounty Tokens. Fully upgraded, it disables standard parries but grants “Bounty Rush”: Temporary speed burst after a multi-kill.
Location: Complete the “Soma the Condemned” bounty in Yotei Grasslands (requires 4 prior bounties to unlock via Kojiro at Hiranui’s Rest Inn). Track Soma to his frozen lair in the northeast ridges—defeat him in a flute-fueled duel to loot the set.
Best For: Aggressive players mastering the new parry mechanics. In duels against Yotei elites, it feels empowering, chaining combos that leave bosses reeling. However, the risk-reward balance can frustrate newcomers; one mistimed block, and you’re paying for it in health potions.
4. Taro’s Armor: The Survivor’s Ragged Warmth
Taro, the enigmatic scavenger you encounter looting battlefields, gifts this patchwork set as thanks for shared meals. It’s less about flash and more about endurance, with furs that ward off Ezo’s relentless blizzards.
Perks (Base):
Increased health regen while cooking: Campfire bonuses last longer.
Reduced cold/fire damage: Ideal for elemental hazards.
Upgrades: Basic mats at any armorer; max level adds “Forager’s Fortune”: Extra loot from animal hunts.
Location: Random camp encounter—set up near your horse in Tokachi Range (south Shizunai Woods works reliably). Cook for Taro when he appears; he’ll hand it over. If missed, he respawns at fixed spots post-Chapter 3.
Best For: Exploration-heavy runs. Pair with survival charms for long treks to Oshima Coast. It’s a fan favorite for its lore tie-in—Taro’s tales humanize the war’s toll.
5. Mercenary Attire: The Ironclad Frontline Brute
Gained mid-story, this heavy plate set suits frontline brawlers, its Mongol-forged steel clanking like a war drum. It’s Atsu’s reluctant nod to the invaders she despises.
Perks (Base):
Boosted stagger on heavy attacks: Break guards easier.
Max health increase: Tank more punishment.
Upgrades: Story-locked until Chapter 4; then Ginji for stagger multipliers.
Location: Automatic reward after the Siege of Tokachi fortress.
Best For: Boss rushes. Clunky movement hampers stealth, but in open fields, it’s a beast.
6. Nine Tail Armor: The Mythic Fox’s Grace
Fox-themed and agile, this set rewards precise archery, drawing from Ezo’s kitsune legends.
Perks (Base):
Faster arrow reload.
Empowered fully drawn shots: Glint indicator for bonus damage.
Upgrades: Archery mats; max adds homing arrows.
Location: Main story, Chapter 6—loot from the Nine-Tailed shaman boss.
Best For: Ranged builds. Devastating against flying drones in later acts.
7. Ainu Robes: The Cultural Heirloom of Harmony
A respectful nod to indigenous allies, this lightweight garb emphasizes balance and spirit.
Perks (Base):
Faster spirit regain.
Bonus from Ainu quests.
Upgrades: Kaeka the elder, not Ginji—uses cultural items.
Location: Complete “The Heart of an Ainu” quest in Tokachi Range.
Best For: Role-players. Enhances side content depth.
8. Ginji’s Guard Armor: The Blacksmith’s Stalwart Defense
Honoring your armorer ally, this set bolsters resolve in prolonged fights.
Perks (Base):
Resolve gain on blocks.
Extended guard hold.
Upgrades: Iron-heavy.
Location: Sensei Tale: “Pride Before Tea” in Oshima Coast.
Best For: Defensive stances.
9. Daijiro’s Set: The Ronin’s Honorable Blade
A classic samurai kit, focused on honorable duels.
Perks (Base):
Parry damage boost.
Stance switch speed.
Location: Blacksmith tip in Tokachi—hunt Daijiro.
Best For: One-on-one.
10. Fundoshi: The Humble Warrior’s Minimalism
Underwear-only for the bold—surprisingly viable for mobility.
Perks (Base):
Max dodge distance.
Heat resistance (from embarrassment?).
Location: All hot springs completed.
Best For: Speedruns. Meme potential high.
11-13. [Deluxe Exclusives: Snake Skin, Oni Mask, and Shadow Cloak]
The Digital Deluxe Edition packs three bonus sets: Snake Skin (sake-perk stealth), Oni Mask (berserk rage), and Shadow Cloak (ultimate invisibility). Upgrades via PSN store.
Perks Vary: Tailored to DLC cosmetics.
Location: Pre-order/Deluxe purchase.
Best For: Collectors. Unlocks “Deluxe Demon” trophy.
Upgrading and Synergies: Maximizing Your Wardrobe
Ginji’s forge is your hub—stockpile ores from mines and pelts from hunts. Upgrades cost escalates: Base (cheap), Tier 2 (mid), Max (quest rewards). Synergize sets; e.g., Crimson Kimono + Nine Tail for hybrid stealth-archery. Dyes? Unlock via haikus for that personal touch.
In Ghost of Yotei, armor isn’t just gear—it’s Atsu’s evolving identity. From the Onryo’s haunt to the Fundoshi’s absurdity, these 13 sets offer replayability that rivals the original’s legends. With Ezo’s map twice the size of Tsushima’s Iki Island, expect 40-60 hours to collect them all. Sucker Punch’s commitment to player agency shines; no set is “best,” but each carves its niche in the legend.
Players on forums like Reddit rave about the immersion, though some gripe at random spawns like Taro’s. Patches have smoothed bounties, per recent updates. If you’re diving in, start with Onryo and branch out—Ezo rewards the patient ghost.
News

Why ‘The Night Manager’ Remains the Gold Standard of Modern Espionage Thrillers
🚨 THE SPY THRILLER EVERYONE IS OBSESSED WITH IS BACK FROM THE DEAD! 🚨 Forget the flashy gadgets—this is the most “dangerously addictive” game of cat-and-mouse ever filmed, and it’s officially sweeping the charts again! 🌎 Tom Hiddleston and Olivia…

Nate Bargatze and Mandy Moore’s ‘Solo Act’ Hits Home: Why Parents Can’t Stop Watching This New Comedy
🚨 PARENTING LEVEL: CATASTROPHIC! 🚨 We’ve all seen the “super-dad” tropes, but this is the first time a show has dared to show what actually happens when the “Perfect Dad” is left home alone for 72 hours. 😱 Nate Bargatze…

The ‘Man on Fire’ Phenomenon: Why Netflix’s Newest Crime Saga Is Keeping Millions Awake
🚨 FORGET EVERYTHING YOU’RE WATCHING. THE DARKEST THRILLER ON NETFLIX JUST DROPPED AND THE INTERNET IS LOSING ITS MIND! 🚨 If you think you know “revenge,” you’ve seen nothing yet. This isn’t just a crime drama—it’s a psychological descent into…

Welcome to ‘The Boroughs’: Why Netflix’s New Sci-Fi Mystery Has Everyone Hooked
🚨 STOP SCROLLING: You Are About to Be Obsessed with This “Senior” Mystery! 🚨 The internet is calling it the “Stranger Things” for the retirement generation, but let me tell you—this is far more twisted than anything you’ve seen before….

The Haunting Complexity of ‘Nuremberg’: Is This Russell Crowe’s Most Polarizing Performance?
🚨 IS RUSSELL CROWE LOSING HIS MIND… OR GIVING THE PERFORMANCE OF THE CENTURY? 🚨 The internet is absolutely split down the middle right now. You’ve seen him as a gladiator and a genius, but you have NEVER seen him…

The Final Binge: Why ‘Hampstead’ Is Disappearing and Why You Need to See It Now
🚨 THIS IS THE FINAL WARNING: A Cinematic Masterpiece Is Vanishing From Netflix Tonight! 🚨 Everyone is talking about this “hidden gem” disappearing from streaming, but barely anyone realized the heartbreaking connection hiding behind the scenes until now. 💔 What…
End of content
No more pages to load