Nine Mistakes to Avoid in Clair Obscur: Expedition 33
Clair Obscur: Expedition 33 is a stunning turn-based RPG with real-time mechanics, a haunting Belle Époque-inspired world, and a deep combat system that blends strategy with reflexes. As you lead Gustave, Lune, and Expedition 33 against the Paintress, you’ll navigate challenging battles, intricate character builds, and a continent brimming with secrets. However, the game’s complex systems—like Stain-based magic, Pictos, and real-time dodging—can trip up beginners, leading to frustrating mistakes that hinder progress. Below, we outline nine common pitfalls to avoid, paired with essential tips to help you start strong and stay prepared for the game’s later challenges. These spoiler-free insights will ensure your expedition thrives.
Mistake 1: Ignoring Exploration
The Continent’s linear but dense map is packed with side paths, hidden chests, and optional bosses. Rushing through the main story means missing Pictos, Chroma (currency), weapons, and lore that enhance your party’s strength. For example, in Spring Meadows, smashing barrels near the Abandoned Expeditioner Camp reveals a resin for a white-painted Nevron, earning a Healing Tint.
Tip: Explore every nook and cranny. Check high and low for Paint Cages (locked chests requiring three nearby locks to open) and smashable crates. Collect Esquie’s missing rocks to unlock traversal methods like swimming or flight, and find lost Gestrals (five unlock Paint Spike destruction) for rare rewards. Exploration not only boosts your resources but also enriches the story with details about past expeditions.
Mistake 2: Neglecting Dodging and Parrying
Combat requires real-time dodging, parrying, or jumping to counter enemy attacks. Many beginners ignore these mechanics, taking unnecessary damage. Dodging has a wider timing window than parrying, which requires precise timing to refund 1 AP and counterattack. On Expeditioner or Expert difficulty, failing to dodge or parry can lead to party wipes, especially against Mimes or Chromatic bosses.
Tip: Focus on dodging early, using the Dodger Lumina (available from Gestral traders in Act 1) to gain 1 AP per perfect dodge. Practice against Portiers in Spring Meadows to learn attack patterns. Save parrying for later, when you’re comfortable with enemy animations. If timing is tough, lower the difficulty to extend QTE windows or enable auto-QTE for flashy animations without stress.
Mistake 3: Overlooking Elemental Weaknesses
Enemies have specific elemental weaknesses and resistances, visible in the battle UI after attacking. Beginners often spam skills without checking, wasting AP on resisted elements. For instance, Nevrons in Flying Waters may resist Fire but be weak to Lightning, making Lune’s Electrify more effective than Immolation.
Tip: Use Lune’s low-AP skills (Electrify, Ice Lance) to probe weaknesses, then follow with high-damage skills like Thunderfall or Wildfire. Equip each character with at least two elemental skills to cover varied weaknesses. Pay attention to “Weak” or “Resist” pop-ups to adjust your strategy, ensuring efficient damage output.
Mistake 4: Mismanaging AP
Action Points (AP) fuel skills and Free Aim shots, but beginners often burn through them with high-cost skills like Hell or Overcharge, leaving characters reliant on weak basic attacks. Running out of AP mid-fight can be disastrous against tough enemies.
Tip: Use low-AP skills (Electrify, Strike Storm) to build AP early. Equip Dead Energy (Act 1 drop) for 3 AP per enemy kill and Dodger for 1 AP per perfect dodge. Lune’s Thermal Transfer generates 4 AP against Burning enemies without ending her turn, especially when paired with Maelle’s Virtuose Stance. Conserve AP for Break opportunities or boss phases.
Mistake 5: Ignoring the Break Meter
Every enemy has a Break meter (yellow bar below health), which fills with damage. Filling it allows Break skills (Overcharge, Fleuret Fury, Earth Rising) to stun enemies for a turn, reducing their defense. Beginners often overlook this, prolonging fights and taking extra damage.
Tip: Use multi-hit skills (Lumière Assault, Fleuret Fury) to fill the Break meter quickly. Target weak points with Free Aim shots to accelerate buildup. Against bosses like Eveque, Break the enemy, then unleash Lune’s Wildfire or Gustave’s Shatter for massive damage. Breaking is your “skip boss mechanics” button—use it wisely.
Mistake 6: Hoarding Chroma and Consumables
Chroma (currency) and consumables like Healing Tints or Chroma Elixirs are plentiful, but beginners often hoard them, fearing scarcity. This leaves characters underpowered and parties vulnerable in tough fights. Chroma can’t be spent until meeting Noco, a Gestral Merchant in Flying Waters, four to five hours in.
Tip: Use Chroma Elixirs to heal outside combat without respawning enemies, as they refresh at Expedition Flags. Spend Chroma freely at Gestral Merchants for Pictos, upgrade materials, and rare items. Don’t save Healing Tints for “perfect” moments—use them to avoid wipes. Similarly, use Recoat items to respec skills or attributes without hesitation, as they’re common.
Mistake 7: Misunderstanding Pictos and Luminas
Pictos provide passive buffs (e.g., +Health, +Speed) and effects like Critical Burn (+25% critical chance on Burning enemies). After four battles, a Picto’s effect becomes a Lumina, equippable without a Picto slot. Beginners often neglect swapping Pictos or misunderstand Luminas, missing out on powerful builds.
Tip: Equip new Pictos until they become Luminas, then swap for unlearned ones. Use Colours of Lumina (found via exploration) to expand Lumina slots at camp. Prioritize Pictos like Dodger, Dead Energy, or Burning Shots (20% chance to apply Burn on Free Aim). Check the Lumina menu regularly to equip learned effects, but note that Luminas don’t provide Picto stat buffs, so balance accordingly.
Mistake 8: Rushing into Danger Zones
Red portals marked “Danger” lead to Chromatic optional bosses, which can one-shot under-leveled parties. Beginners often dive in, expecting to tough it out, only to face frustrating defeats. These fights offer unique weapons and Pictos but require preparation.
Tip: Avoid Danger zones until Act 2 or 3, when you have better gear (Lighterim for Lune, Clierum for Maelle) and levels. If you enter, grab collectibles without engaging enemies, then return later. Practice parrying and dodging against weaker enemies first, as Chromatic bosses demand near-flawless execution. For example, the Chromatic Lancelier in Spring Meadows is manageable after leveling up in Act 2.
Mistake 9: Overleveling Early
The game’s Dark Souls-style enemy respawns at Expedition Flags tempt players to grind excessively, especially in Spring Meadows. Overleveling simplifies early fights but reduces the need to master combat mechanics like Stain management or parrying, leaving you unprepared for later challenges where strategy matters more.
Tip: Avoid excessive grinding. Explore side paths and fight each enemy group once for loot and XP, but don’t repeat encounters unnecessarily. Focus on learning enemy patterns, Stain combos (for Lune), and team synergies (e.g., Maelle’s Burn with Lune’s Thermal Transfer). If combat feels too hard, adjust difficulty or practice dodging instead of overleveling. This keeps the game engaging and prepares you for Act 3’s complexity.
Bonus Tips for Future Readiness
To stay ahead for the mid-to-late game and New Game+ (NG+):
Build Party Synergy: Pair Gustave (Marking, Breaking), Lune (elemental damage, healing), and Maelle (Burn, single-target DPS) early. Later, incorporate Sciel’s Twilight state (Sun/Moon Charges) or Monoco’s Bestial Wheel for unique mechanics. Level relationships via camp conversations to unlock Gradient Attacks at levels 4 and 7.
Invest in Key Attributes: For Gustave and Maelle, prioritize Luck (critical hits) and Agility (turn speed). For Lune, focus on Vitality (survivability) and Luck. Respec with Recoat items to adapt to new weapons like Scaverim (Lune, Act 3).
Master Free Aim: Use Free Aim shots to hit weak points (glowing blue) or special targets, like floating mines in Flying Waters, for AoE explosions. Equip Burning Shots to apply Burn, setting up Lune’s Thermal Transfer.
Engage in Side Content: Complete unlisted side quests (e.g., returning items to white-painted Nevrons) for elixirs and outfits. Fight Mimes for music records and practice, like the one near the Harbour in the prologue for the “A Peculiar Encounter” achievement.
Prepare for Endgame: Save Chroma for Act 3 merchants selling high-cost Pictos and weapon upgrades. Experiment with Lune’s Stain builds (Fire, Lightning, Dark) to prepare for NG+ superbosses, where Stain management is critical.
Conclusion
Clair Obscur: Expedition 33 is a rewarding but demanding RPG that punishes common mistakes like ignoring exploration, mismanaging AP, or rushing into Danger zones. By avoiding these nine pitfalls and following our tips, you’ll build a strong foundation for Act 1, master the game’s unique combat, and stay ready for the challenges of Acts 2, 3, and beyond. Explore thoroughly, dodge strategically, and synergize your party to conquer the Paintress and her deadly Nevrons. Your expedition starts now—make it legendary!
News

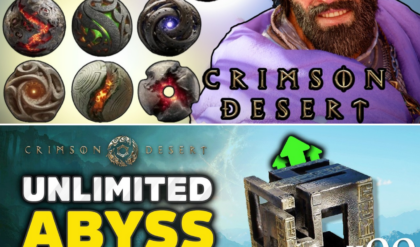
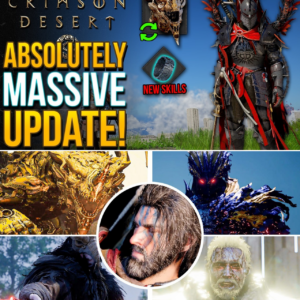
“A CLONE OF ONE’S OWN”: TOP 5 ABYSS GEARS REVEALED AS CRIMSON DESERT PLAYERS OPTIMIZE FOR THE ULTIMATE BOSS GAUNTLET
THE ABYSS GEAR TIER LIST: BECOME UNSTOPPABLE AFTER 200 HOURS! ⚔️🌪️ I’ve officially clocked over 200 hours in Crimson Desert, cleared every boss, and finished every quest. If you’re still using default gear, you’re leaving 50% of your power on…

“CRIME PAYS IN PYWEL”: CRIMSON DESERT PLAYERS DISCOVER BRUTAL NEW XP FARMS AND ARTIFACT GLITCHES
UNLIMITED SKILL POINTS: BECOME A GOD IN PYWEL OVERNIGHT! ⚡🔥 If your skill tree is looking a bit empty, you’re doing it wrong. I’ve discovered three broken farming methods that will flood your inventory with Abyss Artifacts and skyrocket your…
“PEACE IS FLEETING”: PEARL ABYSS UNVEILS MASSIVE CRIMSON DESERT ROADMAP WITH BOSS REMATCHES AND OUTPOST RE-INVASIONS
THE PYWEL REVOLUTION IS HERE: CRIMSON DESERT WILL NEVER BE THE SAME! 👑🔥 Pearl Abyss just dropped a developer update that is going to blow your mind. Starting THIS month and rolling out through June, Crimson Desert is transforming from…
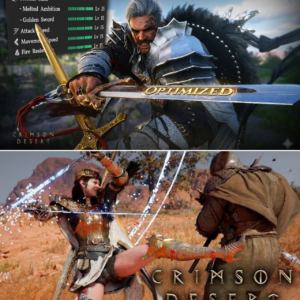
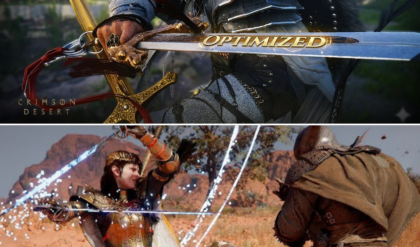
“VISUAL BUG” VANDALISM: CRIMSON DESERT PLAYERS FORCED TO REBUILD AFTER INFAMOUS “DOUBLE CRIT” MYTH DEBUNKED
THE “DOUBLE CRIT” LIE: STOP RUINING YOUR BUILDS! 😱🚫 If you’re still stacking Crit on your necklace and Cuckoo Flame Armor thinking you’re getting “Double Crit” damage—stop. Extensive testing has officially confirmed it’s nothing but a visual bug. You’re sacrificing…
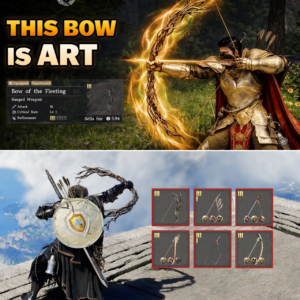
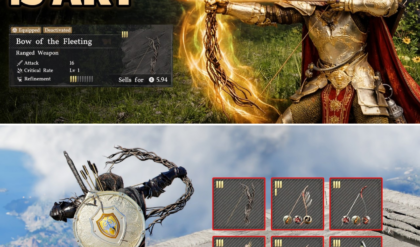
“BEAUTY AT A BLOODY PRICE”: CRIMSON DESERT PLAYERS GRIND THROUGH CRIMINAL UNDERWORLD FOR THE RARE BOW OF THE FLEETING
THE MOST BEAUTIFUL WEAPON IN PYWEL… BUT IT’S A TOTAL NIGHTMARE TO UNLOCK! 🏹✨ I’ve finally found it: the Bow of the Fleeting. It is hands-down the most stunning piece of gear in all of Crimson Desert, but getting your…

“NOT AN ANIMUS GLITCH”: CRIMSON DESERT PLAYERS RECREATE ICONIC ASSASSIN’S CREED LOOK WITH HIDDEN ARMOR SETS
CRIMSON DESERT OR ASSASSIN’S CREED? YOU DECIDE! 🦅🗡️ I don’t even know what game I’m playing anymore, but the drip in Pywel just hit a whole new level. I’ve found the exact armor pieces and dye combinations to turn Cliff…
End of content
No more pages to load