Naoe’s Broken Katana Loadout for Maximum Damage in Assassin’s Creed Shadows
Assassin’s Creed Shadows has redefined open-world stealth and combat with its dual protagonists, Naoe and Yasuke, set against the vibrant backdrop of feudal Japan. For players who love Naoe’s swift, shinobi-style gameplay, there’s one katana loadout that stands head and shoulders above the rest—a build so powerful it feels like cheating. Dubbed the “broken” katana loadout, this setup lets Naoe wreck enemies in seconds, delivering maximum damage with surgical precision. Whether you’re slicing through samurai or obliterating bosses, this loadout maximizes Naoe’s potential to dominate Assassin’s Creed Shadows. Here’s how to build it, why it works, and where to find every piece.
The Heart of the Build: Why This Loadout Is “Broken”
Naoe’s strength lies in her speed, stealth, and ability to chain devastating attacks. This loadout amplifies those traits by combining the Bloodshade Katana with synergistic gear, engravings, and skills to create a damage-dealing monster. The goal? Land critical hits or assassinations that kill instantly, even against elite enemies, while maintaining Naoe’s agility for hit-and-run tactics. The “broken” aspect comes from stacking damage multipliers—Bleed afflictions, Vulnerable procs, and critical hit bonuses—that scale exponentially, letting you clear entire camps in moments.
This build isn’t just about raw power; it’s about efficiency. You’ll spend less time whittling down health bars and more time flowing through Japan’s landscapes like a shadow. Let’s dive into the components, starting with the star of the show: the katana itself.
Core Weapon: Bloodshade Katana
The Bloodshade Katana is the foundation of this loadout, and for good reason—it’s arguably Naoe’s best weapon in Assassin’s Creed Shadows. Its legendary engraving ensures that affliction buildup (Bleed, Poison, Daze) doesn’t drain over time, meaning a single strike can keep enemies bleeding indefinitely until they drop. This makes it perfect for both stealth assassinations and open combat, where you can tag multiple foes and let Bleed do the work.
How to Get It: Head to Izumi Settsu, south of Amagasaki, and find the large ship in Osaka’s waters. Climb to the top, eliminate the few guards, and loot the legendary chest to claim the Bloodshade Katana. It’s accessible early, making it a must-grab for this build.
Why It’s Broken: The Bleed effect stacks with other damage boosts, and since it doesn’t decay, you can hit once and hide while enemies die. Against bosses, this sustained damage is a game-changer, letting you focus on dodging while they bleed out.
For this loadout, engrave the Bloodshade Katana with Critical Damage (unlocked from the Dragon’s Edge Katana after completing the “Topple the Traitor” quest in Yamashiro). This boosts critical hit damage, which is key for one-shot kills.
Gear Setup for Maximum Damage
To push Naoe’s damage to absurd levels, you need gear that enhances critical hits, assassinations, and afflictions. Here’s the optimal setup:
Headgear: Onna-musha Headband
Effect: Guarantees a Vulnerable proc when vaulting over enemies, making them take increased damage from your next attack. This is crucial for setting up one-shot assassinations or finishing blows in combat.
How to Get It: Found in a legendary chest in Nochiseyama Castle, Wakasa, after defeating the castle’s commander. Sneak through the upper keep to avoid heavy patrols.
Why It Fits: Vulnerable enemies amplify the Bloodshade Katana’s Bleed, letting you kill even armored samurai in seconds.
Armor: Yurei-Walker Robes
Effect: Boosts assassination damage and reduces detection range, perfect for stealth-focused players who want to strike hard and vanish.
How to Get It: Looted from a legendary chest in Katano Castle, Izumi Settsu. Use Naoe’s grappling hook to reach the castle’s rooftop and drop into the armory.
Why It’s Broken: The assassination damage boost ensures one-shots on most enemies, while the stealth bonus keeps you undetected for chain kills.
Trinket: Dragonfly’s Cunning
Effect: Increases all stats by 15% when only a katana is equipped, making this a no-brainer for a katana-focused build.
How to Get It: Obtained by completing the “Pirate’s Alliance” side quest in Wakasa after killing Lopo Cruz. The trinket is a quest reward.
Why It Fits: The stat boost affects damage, critical chance, and even Adrenaline gain, supercharging every aspect of this loadout.
Secondary Weapon: Yukimitsu’s Revenge (Tanto)
Effect: Makes afflicted enemies Vulnerable, doubling down on the Bloodshade Katana’s Bleed for massive damage spikes.
How to Get It: Found in the Ancient Tomb of Nanjo Kofun, a dungeon in Yamato. Navigate the traps and loot the chest at the tomb’s heart.
Why It’s Broken: Switching to the tanto after applying Bleed lets you trigger Vulnerable, ensuring even bosses melt under your katana’s next strike.
Skill Tree Priorities
To make this loadout truly broken, invest in skills that amplify damage, critical hits, and mobility. Here’s where to spend your Mastery Points:
Assassin Tree:
Assassination Damage I, II, III (6 points): Increases assassination damage, ensuring one-shots on all but the toughest enemies.
Double Assassinate (3 points): Requires a tanto but lets you kill two enemies at once, doubling your stealth efficiency.
Hand of the Creed (2 points): Guarantees assassinations even if spotted, perfect for sloppy stealth moments.
Katana Tree:
Critical Thinker I, II, III (6 points): Boosts critical hit chance by up to 12%, critical for landing devastating strikes.
Dodge Attack (Generator, No Mercy) (4 points): Launches a counter-attack after dodging, generating Adrenaline and making enemies Vulnerable.
Eviscerate (3 points): Stabs and kicks enemies back, dropping a smoke bomb at max level for escapes or follow-ups.
Tools Tree:
Kunai Assassination Damage I, II (4 points): Enhances kunai for ranged one-shots, giving you a backup when stealth isn’t an option.
Quick Throw (1 point): Lets you instantly throw tools like smoke bombs to set up assassinations.
Shinobi Tree:
Vault (2 points): Enables somersaults over enemies, triggering the Onna-musha Headband’s Vulnerable proc.
Heightened Senses (2 points): Slows time when near detection, giving you a window to strike first.
These skills prioritize damage and stealth, letting you chain kills with ease. Reset points at the Hideout if you want to experiment, but this setup is deadly from early to endgame.
Engravings and Mods
Engravings are where this loadout becomes truly unfair. Use a Level 3 Forge to apply these:
Bloodshade Katana: Keep its default engraving (Affliction Buildup Doesn’t Drain). Add Critical Damage from Dragon’s Edge for bigger crits.
Yurei-Walker Robes: Engrave Assassination Damage (from Shinobi’s Fury Tanto, Nochiseyama Castle) to boost one-shots.
Onna-musha Headband: Add Vulnerable Damage (from Yukimitsu’s Revenge) to capitalize on Vulnerable procs.
Dragonfly’s Cunning: Engrave Adrenaline Gain (from Yami no Kage Katana, Haraiyama Fort) to spam abilities like Eviscerate.
For mods, slot:
Armor Piercing: Cuts through samurai armor for faster kills.
Health Removed on Assassination: Guarantees one-shots by removing health segments.
Critical Chance: Stacks with Critical Thinker for near-constant crits.
Playstyle: Wrecking Enemies in Seconds
This loadout shines in both stealth and combat, letting you adapt to any situation. Here’s how to use it:
Stealth Kills: Start with Heightened Senses to avoid detection. Use Vault to leap over enemies, triggering the Onna-musha Headband’s Vulnerable proc. Strike with the Bloodshade Katana to apply Bleed, then switch to Yukimitsu’s Revenge to make them Vulnerable. Most enemies die instantly; elites bleed out in seconds.
Chain Assassinations: Use Double Assassinate to clear pairs of guards silently. Follow with kunai (boosted by Kunai Assassination Damage) for stragglers.
Open Combat: If spotted, dodge with Dodge Attack to make enemies Vulnerable, then hit with Eviscerate for massive damage and a smoke bomb escape. The Bloodshade Katana’s Bleed ensures survivors don’t last long.
Boss Fights: Apply Bleed with the katana, switch to the tanto for Vulnerable, and vault to stack more Vulnerable procs. Use Critical Thinker and Critical Damage engravings to land crits that chunk health bars. Quick Throw smoke bombs to reposition safely.
Resource Management: Keep Adrenaline high with Dragonfly’s Cunning and Adrenaline Gain mods. Refill kunai and smoke bombs at Kakurega outposts.
This playstyle lets you clear camps in under a minute, with enemies dropping before they can react. The combination of Bleed, Vulnerable, and critical hits is why players on X call this build “straight-up unfair.”
Why This Loadout Breaks the Game
The “broken” nature of this loadout comes from its synergy. The Bloodshade Katana’s persistent Bleed stacks with Yukimitsu’s Revenge’s Vulnerable effect, while the Onna-musha Headband and Vault skill guarantee Vulnerable procs. Critical Thinker and Critical Damage ensure every hit is a potential one-shot, and the Yurei-Walker Robes make stealth kills effortless. The Dragonfly’s Cunning trinket ties it all together, boosting every stat to obscene levels. As one Reddit user put it, “This Naoe build feels like I’m playing on easy mode—nothing survives more than two seconds.”
Web sources like IGN and GameRant praise the Bloodshade Katana for its early accessibility and affliction power, noting it “makes defensive samurai a joke.” Others highlight Naoe’s katana skills like Eviscerate for their ability to “turn fights into cinematic slaughters.”
Final Thoughts
Naoe’s broken katana loadout in Assassin’s Creed Shadows is a masterclass in destruction. With the Bloodshade Katana, Yurei-Walker Robes, Onna-musha Headband, and Dragonfly’s Cunning, plus the right skills and engravings, you’ll shred enemies faster than they can draw their blades. Whether you’re a stealth purist or a combat enthusiast, this build delivers maximum damage with minimal effort, letting you dominate Japan’s battlefields.
So, grab your katana, stalk the shadows, and unleash Naoe’s full potential. Enemies won’t know what hit them—until it’s too late.
News
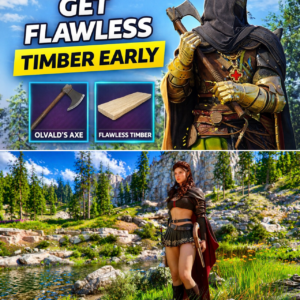
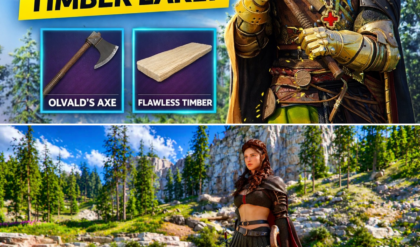
THE LUMBERJACK LEAP: How Crimson Desert Players are Snagging End-Game Wood in Chapter 4
UNLIMITED FLAWLESS TIMBER! 🌲💎 Stop the grind and start the “Hack”! Need that God-tier Shadow Leaf armor or a Grade 9 Bow upgrade? 🏹 Flawless Timber is the rarest wood in Pywel, and most players think it’s locked behind late-game…
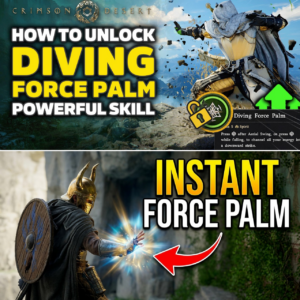
BEYOND THE SKILL TREE: The Secret Odyssey to Unlock Crimson Desert’s Most Iconic Move
UNLOCKED: The “Hidden” God-Tier Move in Crimson Desert! 💥😱 Have you seen that insane aerial AoE slam in the trailers and wondered why it’s not in your skill tree? That’s because Diving Force Palm is HIDDEN behind the most complex…

THE “ICE WALKER” EXPLOIT: How Crimson Desert Players Are Maxing Out Stats in Hours By Gemini News Service | April 17, 2026
LEVEL UP LIKE A GOD! 🚀 Why aren’t you farming the “Ice Walker” yet? Stop the slow grind! 🛑 The community just discovered an “Infinite XP” loop that will max out your Abyss Artifacts in record time—and it’s so easy,…

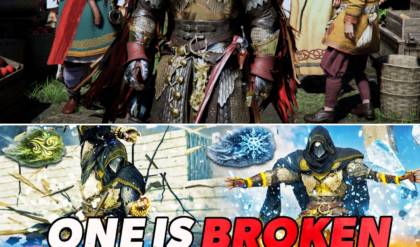
THE CRIMSON DESERT CURSE: Is Pearl Abyss’s Masterpiece Killing the Western RPG?
IS FABLE OFFICIALLY DOOMED? 😱 Crimson Desert is terrifying the entire RPG industry! The “Gold Standard” has shifted, and Western developers are shaking in their boots! 📉⚔️ While players are spending hundreds of hours in the authentic, high-fantasy world of…
ELEMENTAL ANARCHY: Why Fire is the Undisputed King of the Crimson Desert Meta
STOP PLAYING LIKE A NOOB! 🛑 Your Crimson Desert build is literally DYING without this! Why is every top-tier content creator suddenly “Fire-imbued”? 🔥 The secret is OUT: Elements aren’t just “extra damage”—they are a total game transformation. If you’re…
THE ARMOR ARMS RACE: How Crimson Desert’s “Hidden” Gear is Redefining the Pywel Meta
STOP SCROLLING! 🛑 You’ve been playing Crimson Desert WRONG this whole time! Think your current gear is “good enough”? Think again. 📉 The community just uncovered 10 “Hidden” Armor Sets that are literally game-changing—and most players have walked right past…
End of content
No more pages to load