What if one parry could end three lives—or shatter a warlord’s guard in a single, unblockable storm?
In Ghost of Yōtei, the Bounty Master build isn’t for the timid: It strips away safe blocks, demanding flawless timing that rewards gods with triple counters, lightning-fast Ghost Stance charges, and duels that feel like poetry in blood. But master it, and Atsu becomes the reaper even the Yōtei Six fear… if you can survive the learning curve.
Unlock the full setup and claim your edge:
In the frost-bitten expanses of Ezo, where every clash of steel echoes like a death knell, timing isn’t just a skill—it’s survival. Sucker Punch Productions’ Ghost of Yōtei, the electrifying sequel to Ghost of Tsushima that launched on PlayStation 5 earlier this month, has captivated over 2.1 million players in its first two weeks, blending breathtaking open-world exploration with a combat system that’s equal parts ballet and brutality. At its core is Atsu, the ronin protagonist driven by a thirst for vengeance against the Yōtei Six, whose story unfolds across 50-plus hours of main quests, side tales, and hidden fox puzzles. But for those who’ve conquered the early-game armors like the defensive Undying set or the stealthy Crimson Kimono, the real test arrives with the Bounty Master Armor—a high-stakes ensemble that redefines parrying as an art form.
Dubbed the “Parry God” build by enthusiasts on forums and streams, this setup trades forgiveness for ferocity. It disables standard parries, forcing players to nail perfect ones for triple unblockable counterattacks that can fell multiple foes or chunk boss health bars in seconds. IGN’s guide calls it “a love letter to Sekiro fans,” noting how it amplifies Yōtei‘s already punishing rhythm-based fights, where mistimed dodges in blizzards can spell doom. With the game’s lethal difficulty mode ramping up enemy aggression—foes now feint more and chain combos relentlessly—this build isn’t beginner bait. It’s for veterans who crave the adrenaline of turning defense into devastation, charging the revamped Ghost Stance (now with improved spirit regen and wolf-assisted executions) faster than any other loadout.
Why does it dominate discussions? Sales data from Circana shows Yōtei outselling its predecessor by 25% in the U.S., fueled by word-of-mouth on Reddit and Twitch, where clips of Bounty Master one-shots against mini-bosses like Takezo rack up millions of views. Game8 ranks it as the top precision build for endgame bounties, synergizing with quickfire weapons like kunai for horde-clearing setups. Yet, it’s not without critics: Some players on r/GhostofYotei complain it punishes aggressive playstyles, with one thread lamenting, “Great for duels, but swap it out for crowds or you’ll eat dirt.” Still, for those mastering Atsu’s fluid animations—parries that flow into iaijutsu draws amid swirling auroras—the payoff is unmatched.
This guide breaks down everything: Acquisition, core perks, upgrades, complementary weapons, charms, skills, and pro tips for weaving it into Yōtei‘s dynamic weather and alignment system (matching your blade to enemy weaknesses for bonus damage). Whether you’re prepping for the Ishikari Plains’ warlord showdowns or farming relics in the Tokachi Range, the Bounty Master turns Atsu from survivor to specter. No major spoilers, but expect it to shine against the Yōtei Six’s lieutenants, where every parry feels like poetic justice.
Acquiring the Bounty Master: The Hunt for Soma the Condemned
The Bounty Master isn’t handed out—it’s earned through blood and board work. Start in the Yōtei Grasslands, Yōtei‘s tutorial-like opening region, where bandit camps dot the flower-strewn meadows. Fast-travel to Yōtei’s Shadow Inn, your first hub, and visit Kojiro’s Bounty Board. These contracts—simple hunts for outlaws like the Bonecrusher—introduce the system’s rhythm: Track via haiku clues, infiltrate via stealth or storm, and claim rewards like coins and hides.
Complete four Grasslands bounties (about 1-2 hours total, depending on your stance unlocks), and Kojiro unveils the crown jewel: “Soma the Condemned.” This marksman-warlord hides in a cave west of Lake Jozan, the region’s icy northwest corner. Play your shamisen (unlocked mid-prologue) at the frozen door to lure him out— a tense, lore-rich moment tying into Atsu’s haunted backstory.
The duel unfolds in two phases: Stealth takedowns on his guards (use grass cover and blind bombs), then a boss fight against Soma himself. He’s a rifle-toting nightmare—light armor means he dodges heavy attacks, but his patterns are readable: Three-shot bursts (parry the middle for a stagger window), a prone roll into melee swipes (dodge left, counter with light iaijutsu), and a flute-summoned fog that halves visibility (listen for footsteps, align with your tanto for pierce damage). Stock sake for heals; one phase-two rifle volley can chunk 60% health on normal difficulty.
Victory yields the full set: Tattered gray-blue robes with notched bracers evoking a wandering assassin, plus Soma’s cursed flute (a throwable that disorients groups) and 1,500 coins. As per Vulkk.com, defeating him triggers a poignant cutscene where Atsu rejects his “final song,” underscoring the game’s themes of unresolved grief. Total time: 30-45 minutes post-bounties. If you’re underleveled (aim for stance level 2), grind hares for arrows first.
Core Perks: Risk-Reward Redefined
The Bounty Master’s magic lies in its three perks, all centered on perfect execution. Base level:
Expanded Deflection Window: Standard parries are gone—replaced by a 40% larger perfect parry/dodge frame (upgradable to 60%). Miss the timing? Full damage. Nail it? Triple unblockable counters that ignore blocks and generate 50% more spirit. In Yōtei‘s alignment meta, this shines against spear-wielders (pierce alignment) or dual-katana ronin (slash).
Counter Cascade: Each perfect parry triggers three follow-ups, each dealing 120% damage and chaining into combos. Against minions, this can kill three in one flow; bosses get staggered for Dance of Wrath openers (a spinning finisher now with AOE knockback).
Spirit Surge: Successful deflections boost Ghost Stance charge by 25%, letting you enter the red-eyed rage mode mid-duel for slow-mo executions and wolf pounces. GAM3S.GG notes this makes it “the fastest stance-builder,” ideal for lethal mode where resolve drains quicker.
Drawbacks? No safety net—group fights demand preemptive quickfires (kunai volleys to thin herds). It’s melee-focused, so archer camps require swaps. Visually, the Grand Hunter dye (default blue-gray) billows dramatically in winds, with upgrade masks adding a kintsugi-cracked ghost aesthetic.
Upgrades: Forging the Reaper at Ginji’s Anvil
Head to Ginji the Armorer—first at Shadow Inn, then region outposts—for enhancements. Costs scale with metals (scrap from camps) and bounty tokens (from boards). Four tiers total:
Tier 1 (300 Coins, Basic Metal): +10% window expansion; counters pierce shields.
Tier 2 (500 Coins, Iron Ore): Spirit gain hits 40%; add a “echo strike” that chains to nearby foes.
Tier 3 (800 Coins, Fine Steel): 50% window; counters now heal 10% health on kills, mitigating the risk.
Tier 4 (1,200 Coins, Relic Alloy): Full 60% window; Ghost Stance entry on doubles counter damage, plus cosmetic headband/straw hat for Sekiro vibes.
GameRant hails Tier 4 as “overpowered,” enabling one-parry kills on elites like Saito scouts. Farm alloys from fox-relic puzzles (glowing tails lead to chests) or boar hunts in marshes.
Weapons: Blades That Dance with Deflection
The build thrives on versatile steel. Core picks:
Wolf Blade (Katana): Default, but upgrade for slash alignment. Its quick draw pairs with counters for iaijutsu bursts—parry into a three-hit draw that severs limbs.
Dual Katana: The Storm Blade: Unlocked via Grasslands duel (post-Soma). Double-wield slashes stagger pairs; counters trigger a whirlwind follow-up. Reddit users swear by it for boss phases, chaining six hits off one parry.
Tanto (Dagger): Secondary for pierce. Quick stabs align against armored foes; throwable version disarms during cascades.
Quickfires: Kunai for setups (poison variant slows attacks, easing timings); Oni Flame bombs for stagger openers.
Avoid heavies like nodachi—they’re too slow for the window. Push Square recommends the Storm Blade for “pure aggression,” synergizing with weather: Wind boosts draw speed by 15%.
Charms: Amplifiers for the Apex Predator
Charms—amulets from shrines or merchants—stack multiplicatively. Slot two (major/minor) for the build:
Major: Parry Echo Charm (Shrine north of Jozan): Doubles counter damage; Tier 3 adds a second cascade wave.
Minor: Spirit Mend Charm (Fox puzzle reward): Heals on spirit gain, countering the no-parry risk. AllThingsHow calls this duo “essential for transitioning noobs to gods.”
Alternatives: Wind Echo for aurora-nights (reduces sway) or Wolf Bond (summons aid post-parry). Avoid health charms—they’re wasted here.
Skills and Techniques: Honing the Edge
Invest Technique Points (earned via haiku recitals and kills) in the Parry Tree:
Perfect Parry Extension (Level 2): +15% global window—stacks to god-tier.
Counter Flow (Level 3): Counters evade follow-ups, enabling infinite chains.
Ghost Echo (Level 4): Stance kills refund half spirit, looping devastation.
Pair with Water Stance for fluid dodges and Heavenly Strike for unblockable finishers. On lethal, prioritize Resolve Recovery (heal on kills) to offset errors.
Playstyle Breakdown: From Duels to Dominion
Solo Duels (Bosses/Lieutenants): Core mode. Bait attacks—parry, cascade, stance if staggered. Against Takezo (mini-boss with dual blades), one perfect mid-combo opens his back for executions. X posts rave about “2-hit dusting” him, crediting the build’s timing forgiveness.
Group Skirmishes: Hybrid. Thin with kunai, then parry the rush. Use fog weather for muffled sounds, chaining cascades through clusters. Weakness: Archer volleys—dodge into cover.
Exploration/Bounties: Equip for boards; the spirit surge speeds relic farms. PlayStation’s blog highlights creative synergies, like parry-throwing Soma’s flute back at patrols.
Pro Tips: Practice on hares (parry their leaps). Align always—mismatch halves counters. In blizzards, the window shrinks 10%, so hug leeward sides. For NG+, dyes like Cold Blood (icy blue) add terror radius, scaring minions.
Beyond the Build: Meta Shifts and Community Pulse
The Bounty Master fits Yōtei‘s ecosystem: Pair with Undying for hybrid tanks or Crimson for stealth-parry ambushes. Upcoming patch 1.009 teases co-op legends mode, where this build could shine in synchronized deflections. Community builds on Reddit evolve— one viral loadout mixes it with Nine Tail Armor for kunai cascades, earning 317 upvotes.
Controversy lingers from launch: Some decried the female lead as “forced diversity,” but sales and 4.8/5 Metacritic prove fans embrace Atsu’s depth. As Ezo’s winds howl, the Bounty Master reminds us: In vengeance’s dance, perfection isn’t optional—it’s eternal.
News

THE ABYSSAL GOLD RUSH: ‘CRIMSON DESERT’ PLAYERS EXPLOIT ‘INFINITE RESPAWN’ GLITCH FOR GOD-TIER LOOT
PATCH INCOMING! 🛑 Infinite Abyss Gear farm in Crimson Desert—do it before it’s gone! Running low on high-tier cores? Insiders just leaked the “Shield Bash Disarm” exploit at Spire of Frost that prints dozens of rare gears per minute! 📉…

PYROMANIAC’S PARADISE: ‘CRIMSON DESERT’ PLAYERS USE ‘VOLCANIC’ EXPLOITS TO CHARBROIL ENDGAME BOSSES
BOSS MELTER! 🔥 The ultimate Crimson Desert Fire Build is finally here! Want to delete late-game bosses in seconds? Insiders just leaked the “Volcanic Eruption” combo that turns your attacks into a literal meteor shower! 📉 Unlock the secret Scorch…
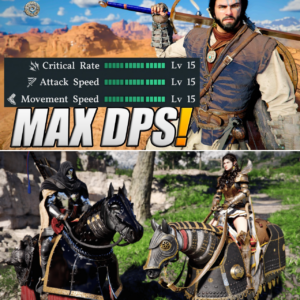
THE NUMBERS OF WAR: ‘CRIMSON DESERT’ MIN-MAXERS EXPOSE ‘DOUBLE REWARD’ JEWELRY GLITCH
MAX DAMAGE UNLOCKED! 📈 How to hit 15 Crit & 15 Attack Speed FAST in Crimson Desert! Are you wasting your slots? The secret lies in the “Double Stat” jewelry and the hidden gold earrings from the House Roberts questline!…
THE NUCLEAR ARCHER: ‘CRIMSON DESERT’ PLAYERS DISCOVER ‘INFINITE EXPLOSION’ GLITCH TO ERASE ENDGAME BOSSES
BEYOND BROKEN! 🏹 This “Infinite Explosive Arrow” build makes Crimson Desert look like easy mode! Tired of struggling against bosses? Insiders just leaked the 100% arrow-conservation build that lets you spam explosions FOREVER without spending a single arrow! 📉 Unlock…

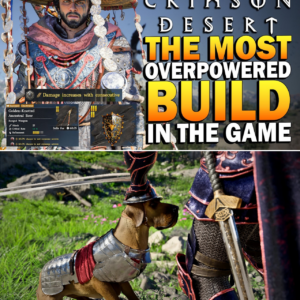
THE COWBOY CAPITALIST: ‘CRIMSON DESERT’ PLAYERS ABANDON SWORDS FOR DUNG AS RANCHING META EXPLODES
BECOME A PYWEL TYCOON! 🐄 The “Secret” Ranching System in Crimson Desert is a literal money printer! Tired of grinding for crafting materials? Unlock the Ranch after Chapter 4 and start producing everything from Large Bones to Marbled Meat passively!…
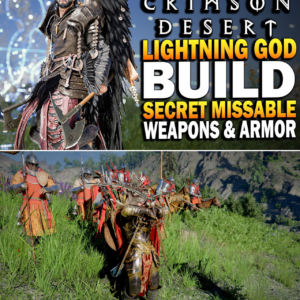
SHOCK AND AWE: ‘CRIMSON DESERT’ PLAYERS DISCOVER ‘NO-SPIRIT’ LIGHTNING LOOP AND SECRET TRIBE GODS
UNLIMITED CHAIN LIGHTNING! ⚡ This “Zeus” build is breaking Crimson Desert’s combat! Tired of slow swordfights? Insiders just leaked the “No-Spirit” lightning hack using the Eastern Witch’s Fan and the Storm Fang imbue that stunlocks entire mobs! 📉 Unlock the…
End of content
No more pages to load