🚨 500+ HOURS GRINDING ARC RAIDERS… I CRACKED THE CODE TO FARM ALL 74 BLUEPRINTS IN DAYS! 😱💀
Noobs rage-quitting empty-handed while pros stack god-rolls like candy…
This INSANE blueprint farm gets you Tempest, Wolfpack & EVERY rare print GUARANTEED – ZERO BS routes that DROPPED ME 10+ PER SESSION!
#3 will SHATTER your world… 👀💎
Drop in NOW before patches NERF it forever! 🔥
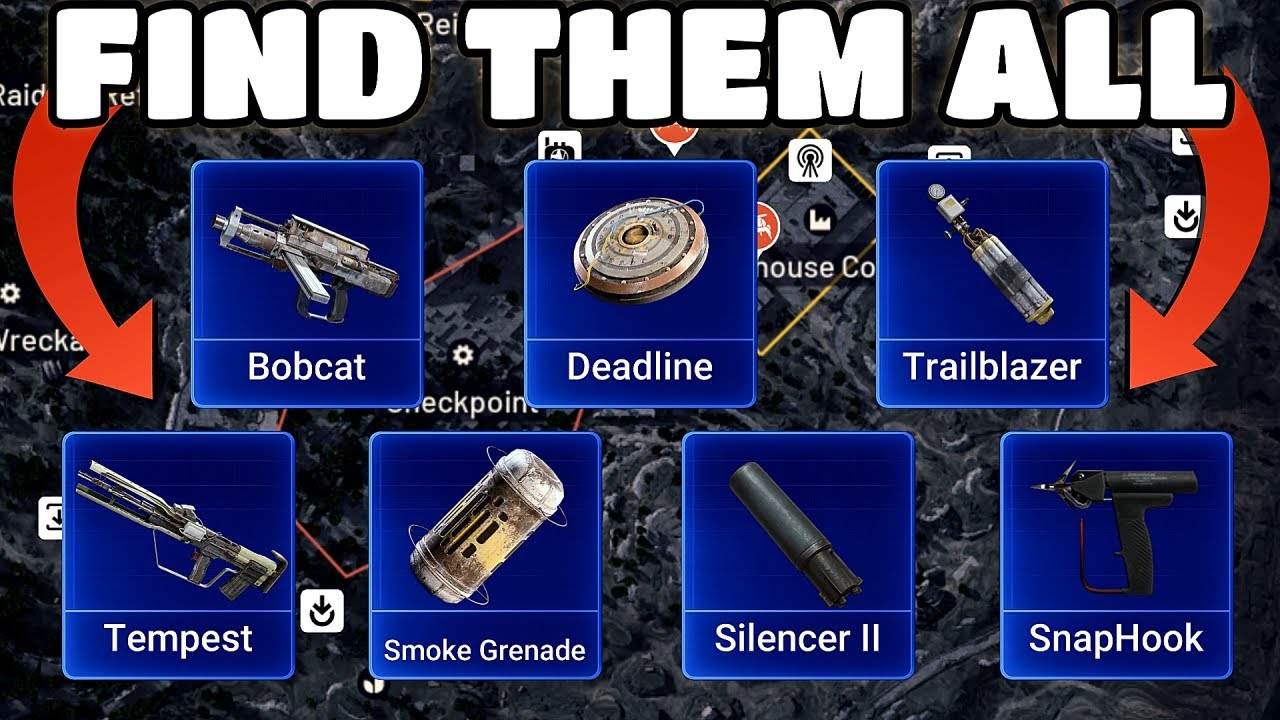
In the high-stakes world of ARC Raiders, the multiplayer extraction shooter from Embark Studios that launched on October 30, 2025, blueprints are the holy grail. These 74 crafting recipes unlock everything from legendary weapons like the Tempest and Vulcano to essential augments and grenades, transforming a basic raider into an unstoppable force amid the ruins of Speranza. For players sinking hundreds of hours into the PvPvE chaos—dodging ARC monsters, rival raiders, and dynamic events—farming these elusive items can mean the difference between wiping on a Harvester event or dominating leaderboards.
One such veteran, claiming over 500 hours in the game, has distilled a comprehensive blueprint farming bible that’s circulating rapidly in communities like Reddit’s r/ArcRaiders and X (formerly Twitter). Drawing from data-driven tests, community polls analyzing over 3,100 drops, and post-patch optimizations (including the North Line 1.2.0 update that boosted rare blueprint reliability), the strategies promise “guaranteed” one blueprint per 30-minute run under ideal conditions. “It’s not luck anymore—it’s math,” the player asserts in shared guides, emphasizing repeatable loops that prioritize high-tier containers over aimless looting.
Blueprints drop randomly from world containers, with rates influenced by map conditions, events, and loot quality. Post-launch patches adjusted drops from an initial 5-7% to a more balanced 2-3%, but targeted farming exploits environmental buffs to hit 1-2 per short raid. Community data shows night raids and electromagnetic storms boosting odds significantly—Tempest blueprints skew toward Buried City nights, Snap Hooks toward storms—while events like Hidden Bunkers favor Vulcano.
Preparation is key. Load in “naked” with just a safepocket (upgraded via Looting Mk. II augment for multi-BP storage) to minimize weight and risk. Sprint nonstop to red/high-loot zones—residential/commercial areas like Blue Gate Village—prioritizing drawers, cabinets, orange/white lockers, and desks first. These “filler” containers roll blueprints at surprising rates, especially in breach rooms. Safepocket any blueprint immediately, learn it at Speranza’s workshop (consuming duplicates for credits), and extract via low-contest hatches. Friendly raiders? Shout “hi raider,” drop extras for swaps—turning potential kills into trades.
Map conditions dictate priority: Electromagnetic Storm reigns supreme, yielding 1+ BPs per 30 minutes with lighter ARC presence and juiced containers (e.g., Wolfpack, Snap Hook). Night raids follow for consistent epics; day runs are fallback only. Surrender (30-60 second respawn) if spawning far from loot—efficiency over ego.
Top routes cluster on compact maps for 8-12 loops per hour:
Buried City (Prime for Tempest/Wolfpack): Grandioso Apartments rooftops (zipline drops to dual weapon cases), Plaza Rosa Pharmacy (multi-floor med bags/grenade canisters), Marano Station breach room (black raider boxes), and secret rooftop jumps. One player netted multiple Tempests here in nights. Loop: Spawn → Pharmacy → Grandioso → Extract south.
Dam Battlegrounds: West Broken Bridge hidden vault (ledge drop to cases/meds), Testing Annex (storm magnet for high-tier meds), Control Tower (top-down slide with traps). Yellow zone PvP manageable with smokes.
Blue Gate: Village underground breach (augments like Survivor Looting), Reinforced Reception puzzle/breach (color terminals to stashes), vent ziplines to cases. Residential density shines in nights.
Stella Montis/Spaceport: Security Checkpoint (four-floor breaches to raider caches), Fuel Lines pipe (vertical case drop), Departure Bathroom (shower stall goldmine). Ideal for short 6-7 minute loops: Armory → Medical → Industrial → Dock.
High-tier containers are non-negotiable: Weapon cases (top odds), ticking Raider Caches (Night Mode audio cue), black boxes, med duffels, grenade tubes, ammo crates, red lockers. Kill ARC Surveyors with stuns (Showstopper grenades) for bonus rolls.
For rares (Tempest <0.5% base, Bobcat/Vulcano event-tied): Target pools—medical wings for heals, industrial for parts. Track via printable checklists grouping 74 BPs (weapons, augments, etc.). Harvester puzzles guarantee Jupiter/Equalizer; Trials/quests lock others like Hullcracker. Duplicates? Sell for 5,000 coins to fund runs.
Community echoes these tactics: X polls and Reddit threads confirm storm/night superiority, with 50% extraction rates yielding 2-6 purples per session. Patches like 1.7.2 tweaked legendaries, but core loops hold. Off-peak play dodges sweats; solo for speed, squad for events.
Whether you’re a fresh raider or expedition grinder, this 500-hour blueprint blueprint turns grind into gains. As one X post quipped, “From zero to hero—one drawer at a time.” Embark’s evolving Speranza keeps the hunt alive—farm smart, extract rich.
News
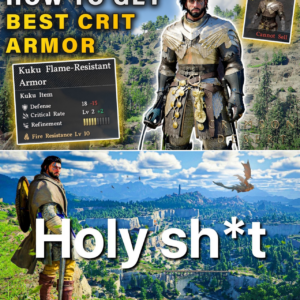
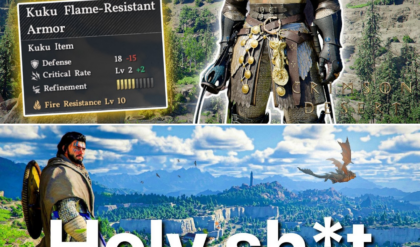
CRITICAL BREAKTHROUGH: Why the Kuku Flame-Resistant Armor Is the Single Best Piece of Gear in Crimson Desert
THE “BROKEN” GEAR PIECE THAT CHANGES EVERYTHING! 🛡️🔥😱 Stop wasting your Abyss Gear slots! This one armor piece can max out your Critical Rate and free up your entire build. Meet the Kuku Flame-Resistant Armor! 🚨 The Crimson Desert community…
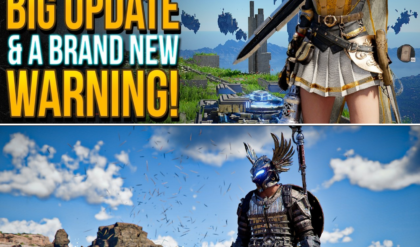
THE STORAGE SUPREMACY: Patch 1.02 Delivers 1,000-Slot Inventory but ‘Breaks’ Travel and Menus in Crimson Desert
HUGE CRIMSON DESERT UPDATE + CRITICAL WARNING! 🛠️📦⚠️ Patch 1.02 is officially here, and while the storage buff is INSANE, there’s a new menu “trap” that could cost you your save file! 🚨 The Crimson Desert community is celebrating a…

BEYOND THE CLIFFHANGER: Everything We Know About ‘Sistas’ Season 11 as Season 10 Rocks the Charts
THE CLIFFHANGER THAT SHATTERED THE INTERNET! 😱 Tyler Perry just pulled the ultimate “Gotcha” and now the countdown to Season 11 is officially ON. Is anyone truly safe in Atlanta anymore? Andi’s car explosion was just the beginning, and Fatima’s…

THE SEOUL SHAKEUP: Why ‘XO, Kitty’ Season 4 is Casting Aside the Rom-Com Tropes for a Gritty International Drama
SEOUL IS SCREAMING! 🇰🇷✈️ The XO, Kitty Season 4 trailer just dropped and forget everything you thought you knew about Kitty Song Covey. This isn’t a rom-com anymore—it’s a REVOLUTION! Min Ho’s secret family legacy, Yuri’s impossible choice, and a…
THE MIRACLE AT KINGS MOUNTAIN: How Claire Fraser Used ‘Blue Light’ to Cheat Death and Save Jamie in ‘Outlander’s’ Most Epic Episode
SHE DID IT. 😭🙌 After 10 years and two centuries of searching, Claire Fraser just performed the impossible. The “Blue Light” wasn’t a myth—it was the only thing standing between Jamie and the afterlife! Kings Mountain took him down, but…

THE GOLD STANDARD: Why the ‘Outlander’ Season 8, Episode 6 Trailer is Being Called a ‘Perfect Masterpiece’
NO NOTES. ABSOLUTELY ZERO NOTES. 😭🙌 The Outlander Season 8, Episode 6 trailer is quite literally the most PERFECT minute of television ever edited. It’s the soul of the books met with the budget of a blockbuster! The way Jamie…
End of content
No more pages to load